Webhooks
Overview
EnOcean SmartStudio webhooks enable real-time data delivery from your EnOcean sensors to your HTTP server. When a sensor transmits data, SmartStudio automatically forwards the telegram data to your configured endpoint as an HTTP POST request.
This integration is ideal for:
- Real-time data processing and analytics
- Integration with existing business systems
- Custom application development
- Third-party platform connectivity
Network Requirements
All webhook communication from SmartStudio to your server is outbound over standard HTTP/HTTPS ports.
Ensure your server is accessible from the following endpoint:
- Source: ingress.enocean.cloud
- Ports: 80 (HTTP) or 443 (HTTPS)
- Protocol: HTTP POST requests
Configuration
Step 1: Access Webhook Settings
- Log into EnOcean SmartStudio
- Navigate to Integrations
- Select Webhook
Step 2: Configure Connection Settings
- Server URL: Enter your HTTP/HTTPS endpoint URL where you want to receive the data
-
Authentication: Choose the appropriate authentication method:
- None: No authentication required
- Basic: Username and password authentication
- Bearer: Token-based authentication
- Custom Header: Custom authentication header
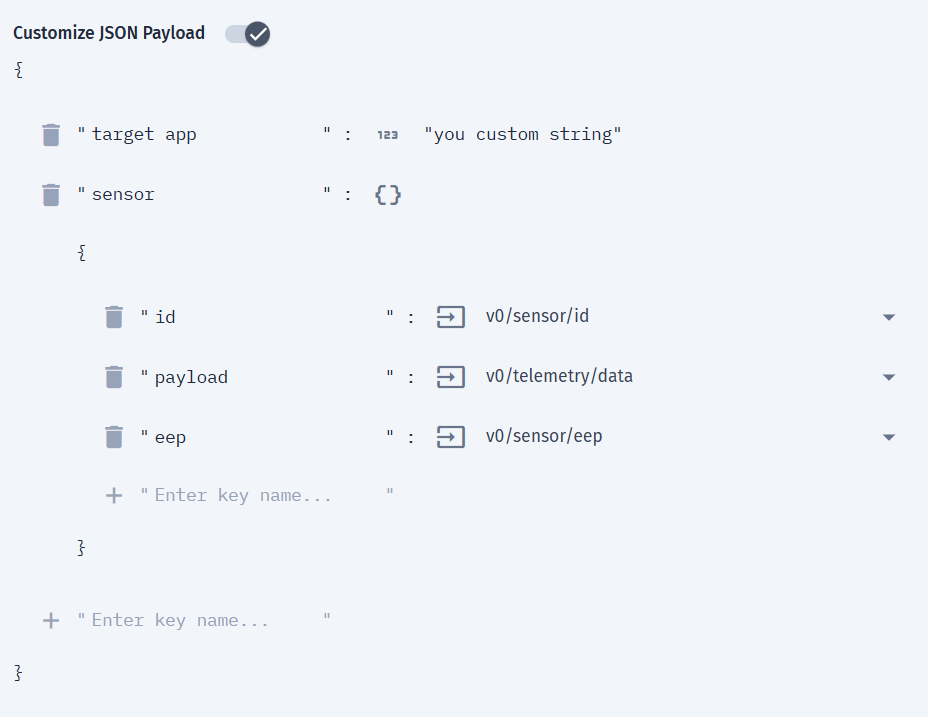
Step 3: Customize JSON Payload (Optional)
You can customize the JSON structure sent to your server:
- Enable Customize JSON payload option
- Configure key-value pairs where:
- Keys: Custom string names for your data fields
- Values: Can be any of the following:
- SmartStudio telemetry objects (sensor ID, EEP profile, signal strength, etc.)
- Static primitive values (strings, numbers, booleans)
- Nested JSON objects
This allows you to tailor the webhook payload to match your server's expected data format.
Example Configuration:
Note
Customizations to the telemetry payload data values from the sensors is currently not possible.
Step 4: Save and Enable
- Click Update to save your configuration changes
- Enable the integration using the toggle switch at the top of the page
Important
The webhook integration will only start sending data after you enable it using the toggle switch. Don't forget this final step!