Configuration using Aruba Controller
Aruba Controller
An Aruba Controller Network is a centralized architecture that provides unified management and control over a network of Aruba Access Points (APs), ensuring seamless, secure, and scalable connectivity. In this setup, an Aruba controller acts as the aggregator of the network, managing traffic routing, user authentication, RF optimization, and security policies across all connected APs.
Step 1: Connect to ArubaOS
Log into the web-based management page for ArubaOS.
Step 2: Installing Trusted CA Certificates
Note
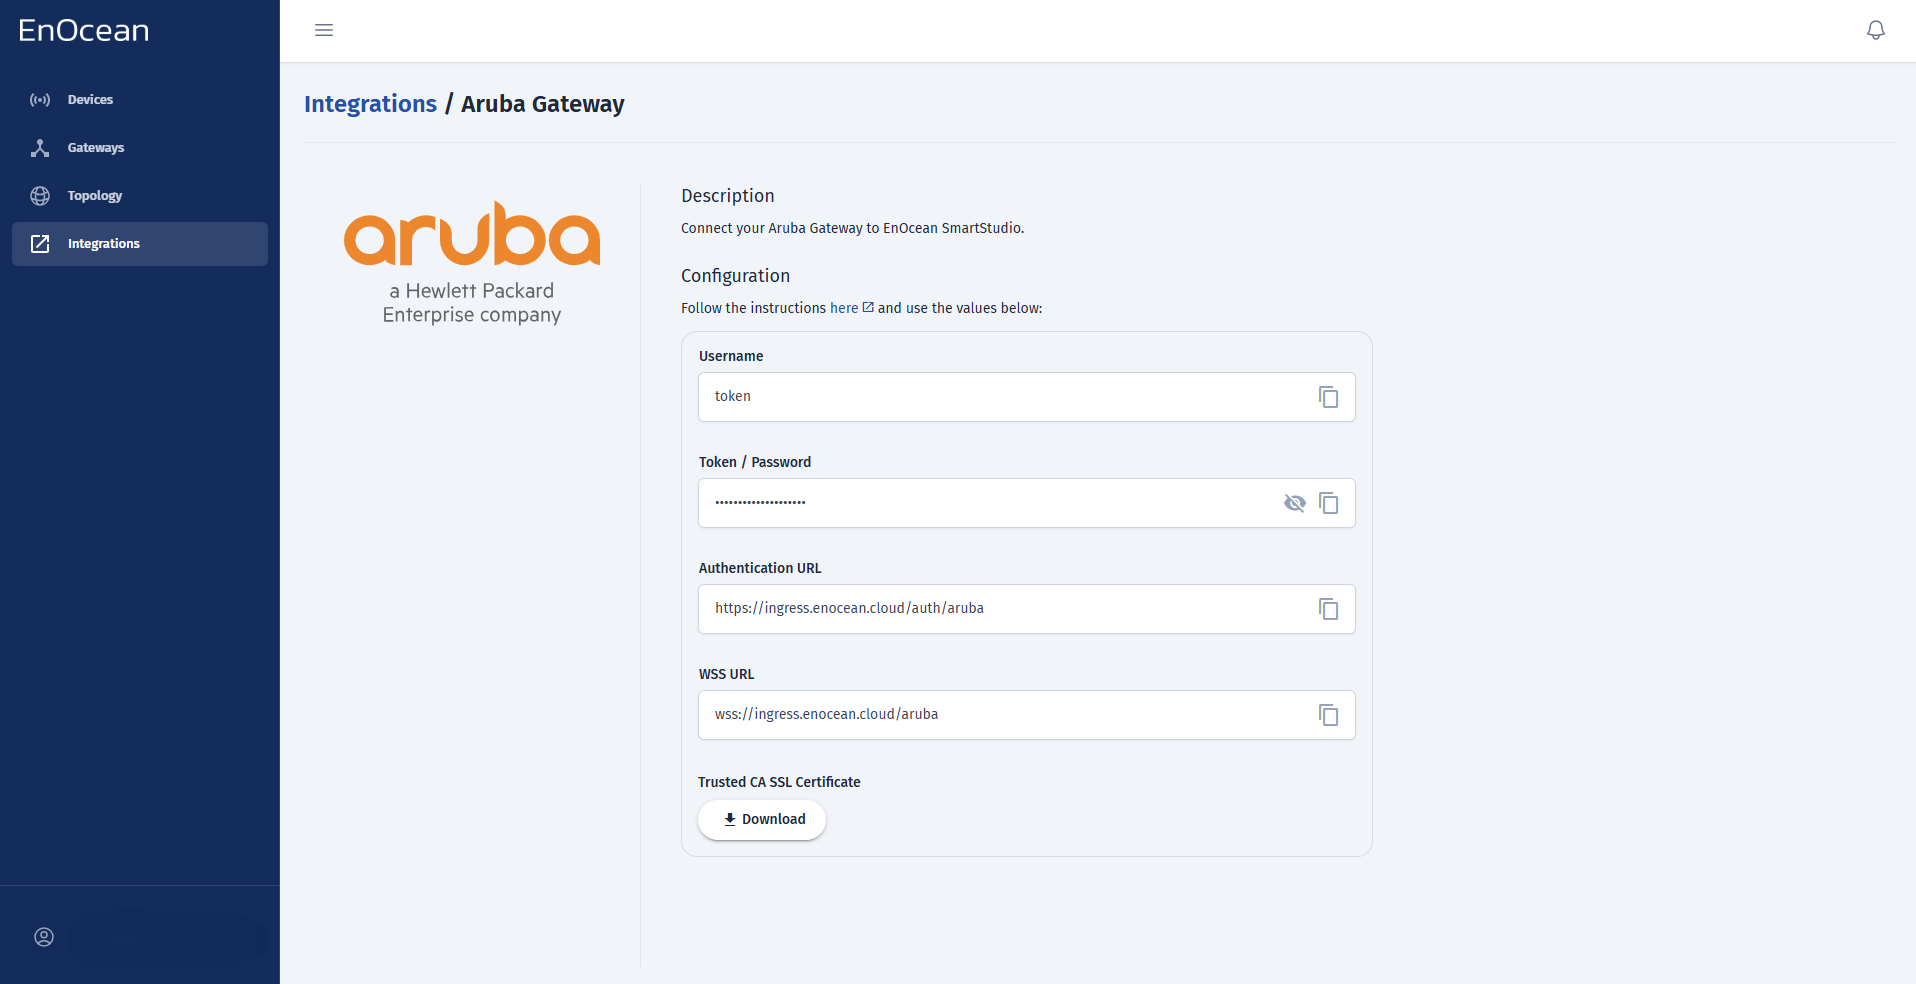
The Username, Password, Authentication URL, WSS URL and the Trusted CA Certificate can be obtained from SmartStudio -> Integrations section -> Aruba Gateway like shown below. It is also recommended to generate a random 10-character string to use as your client ID.
-
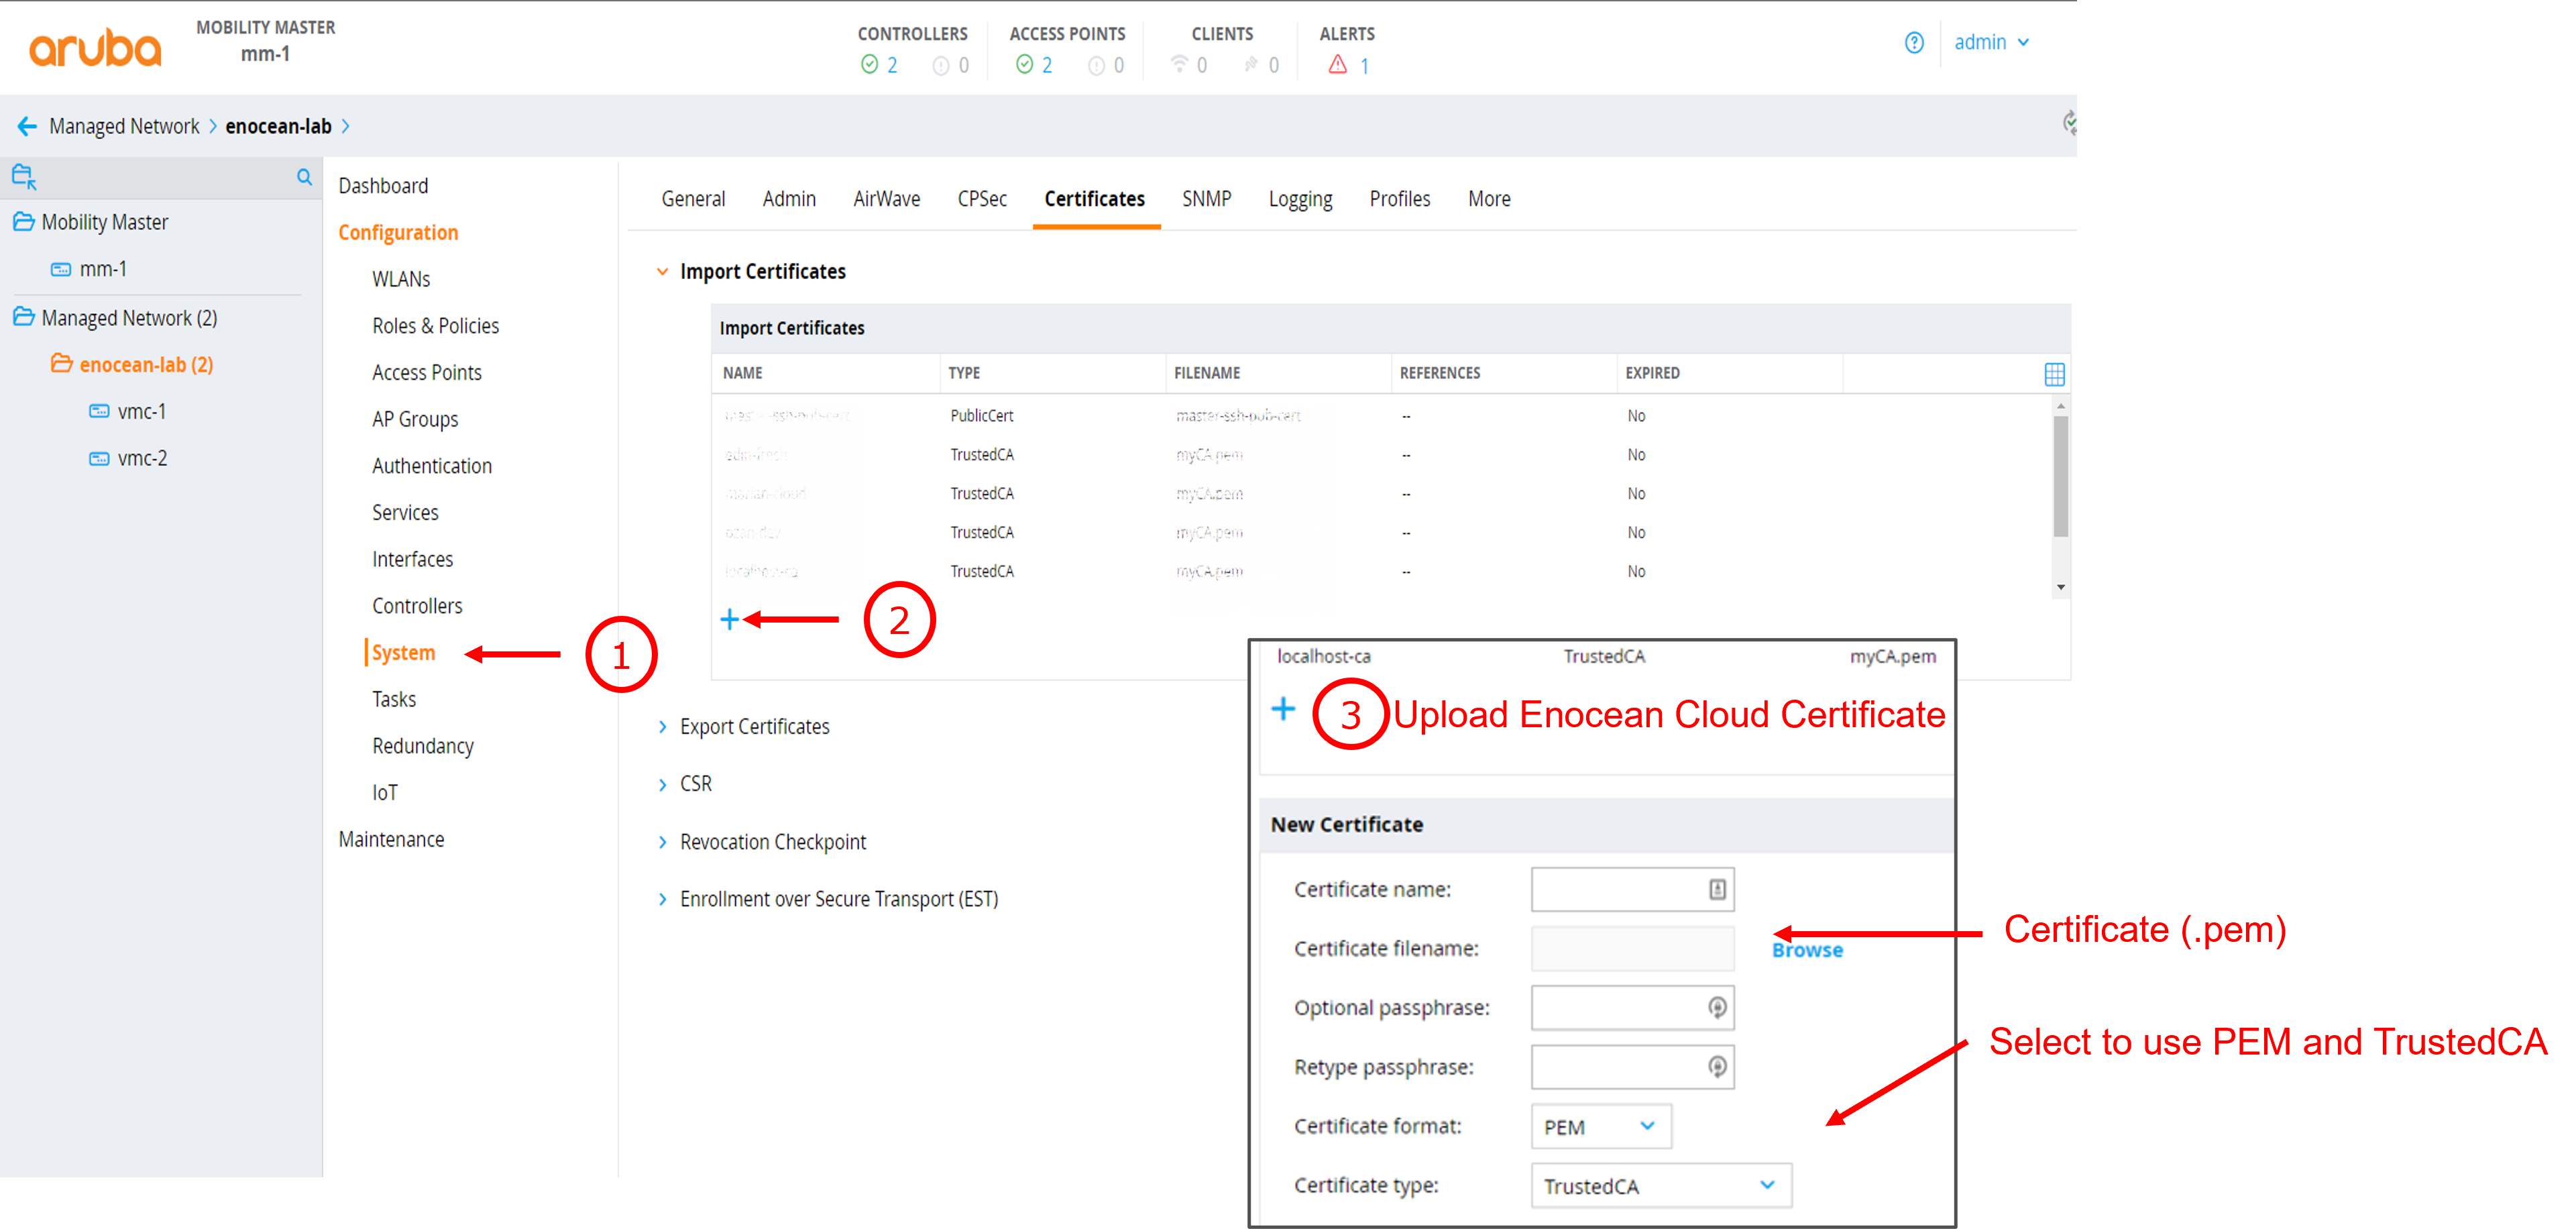
In your managed network tab select Configuration -> System -> Certificates Click the + to upload a new certificate. select Trusted CA as certificate type and x509(.pem .cer or .crt) as Certificate format.
-
Click Upload Certificate to save your settings.
-
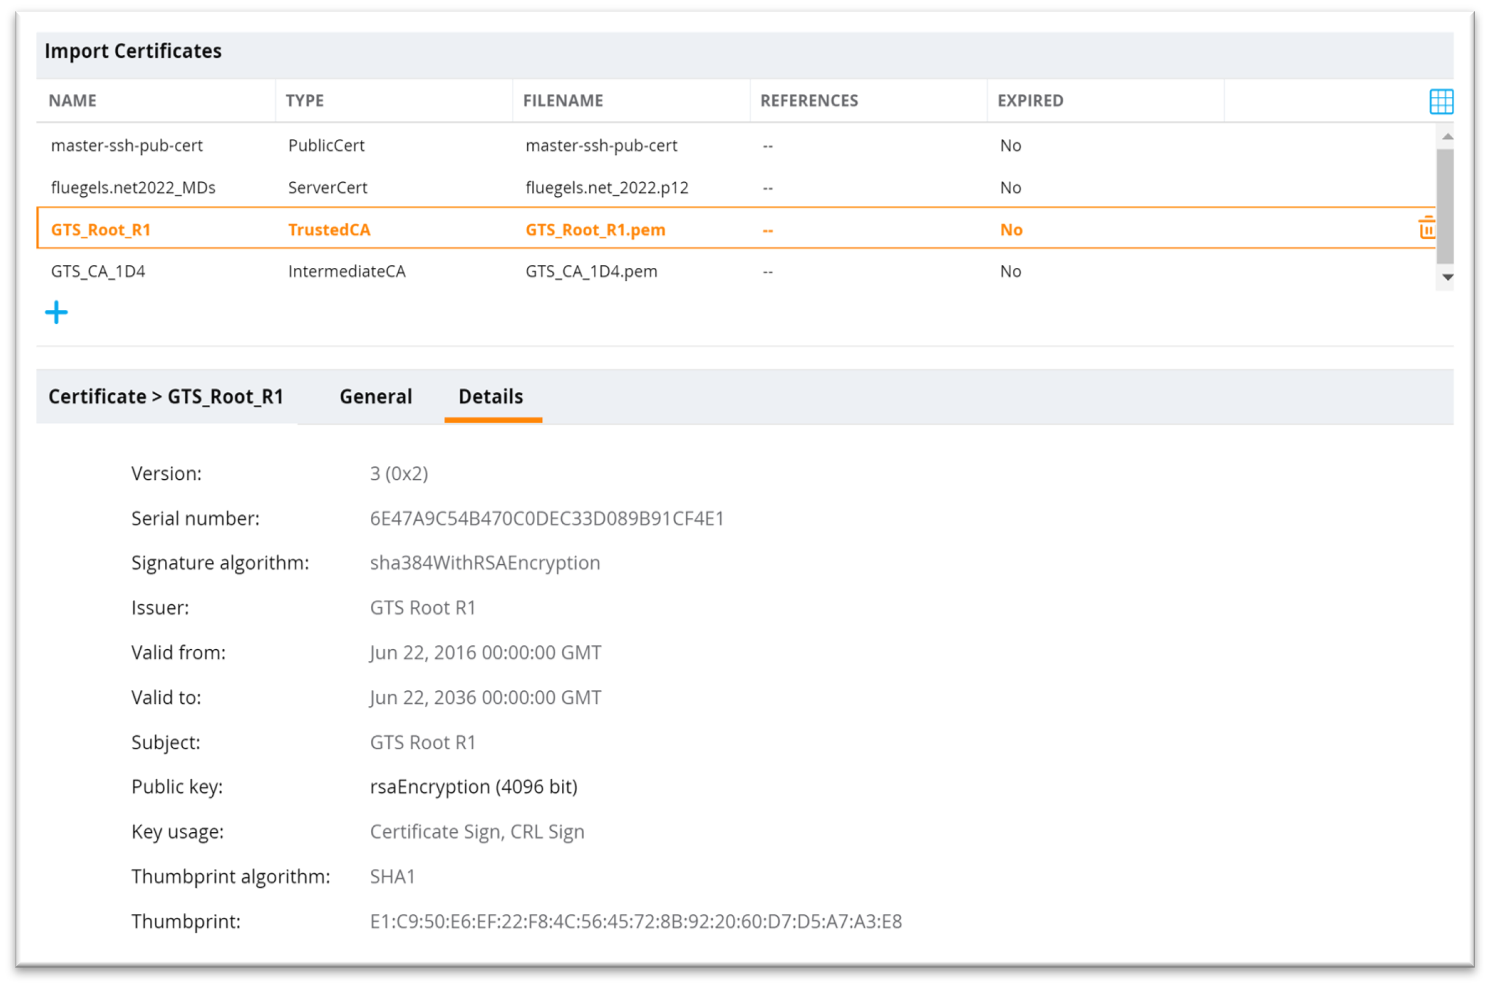
Verify that the certificate is shown on the certificates list.
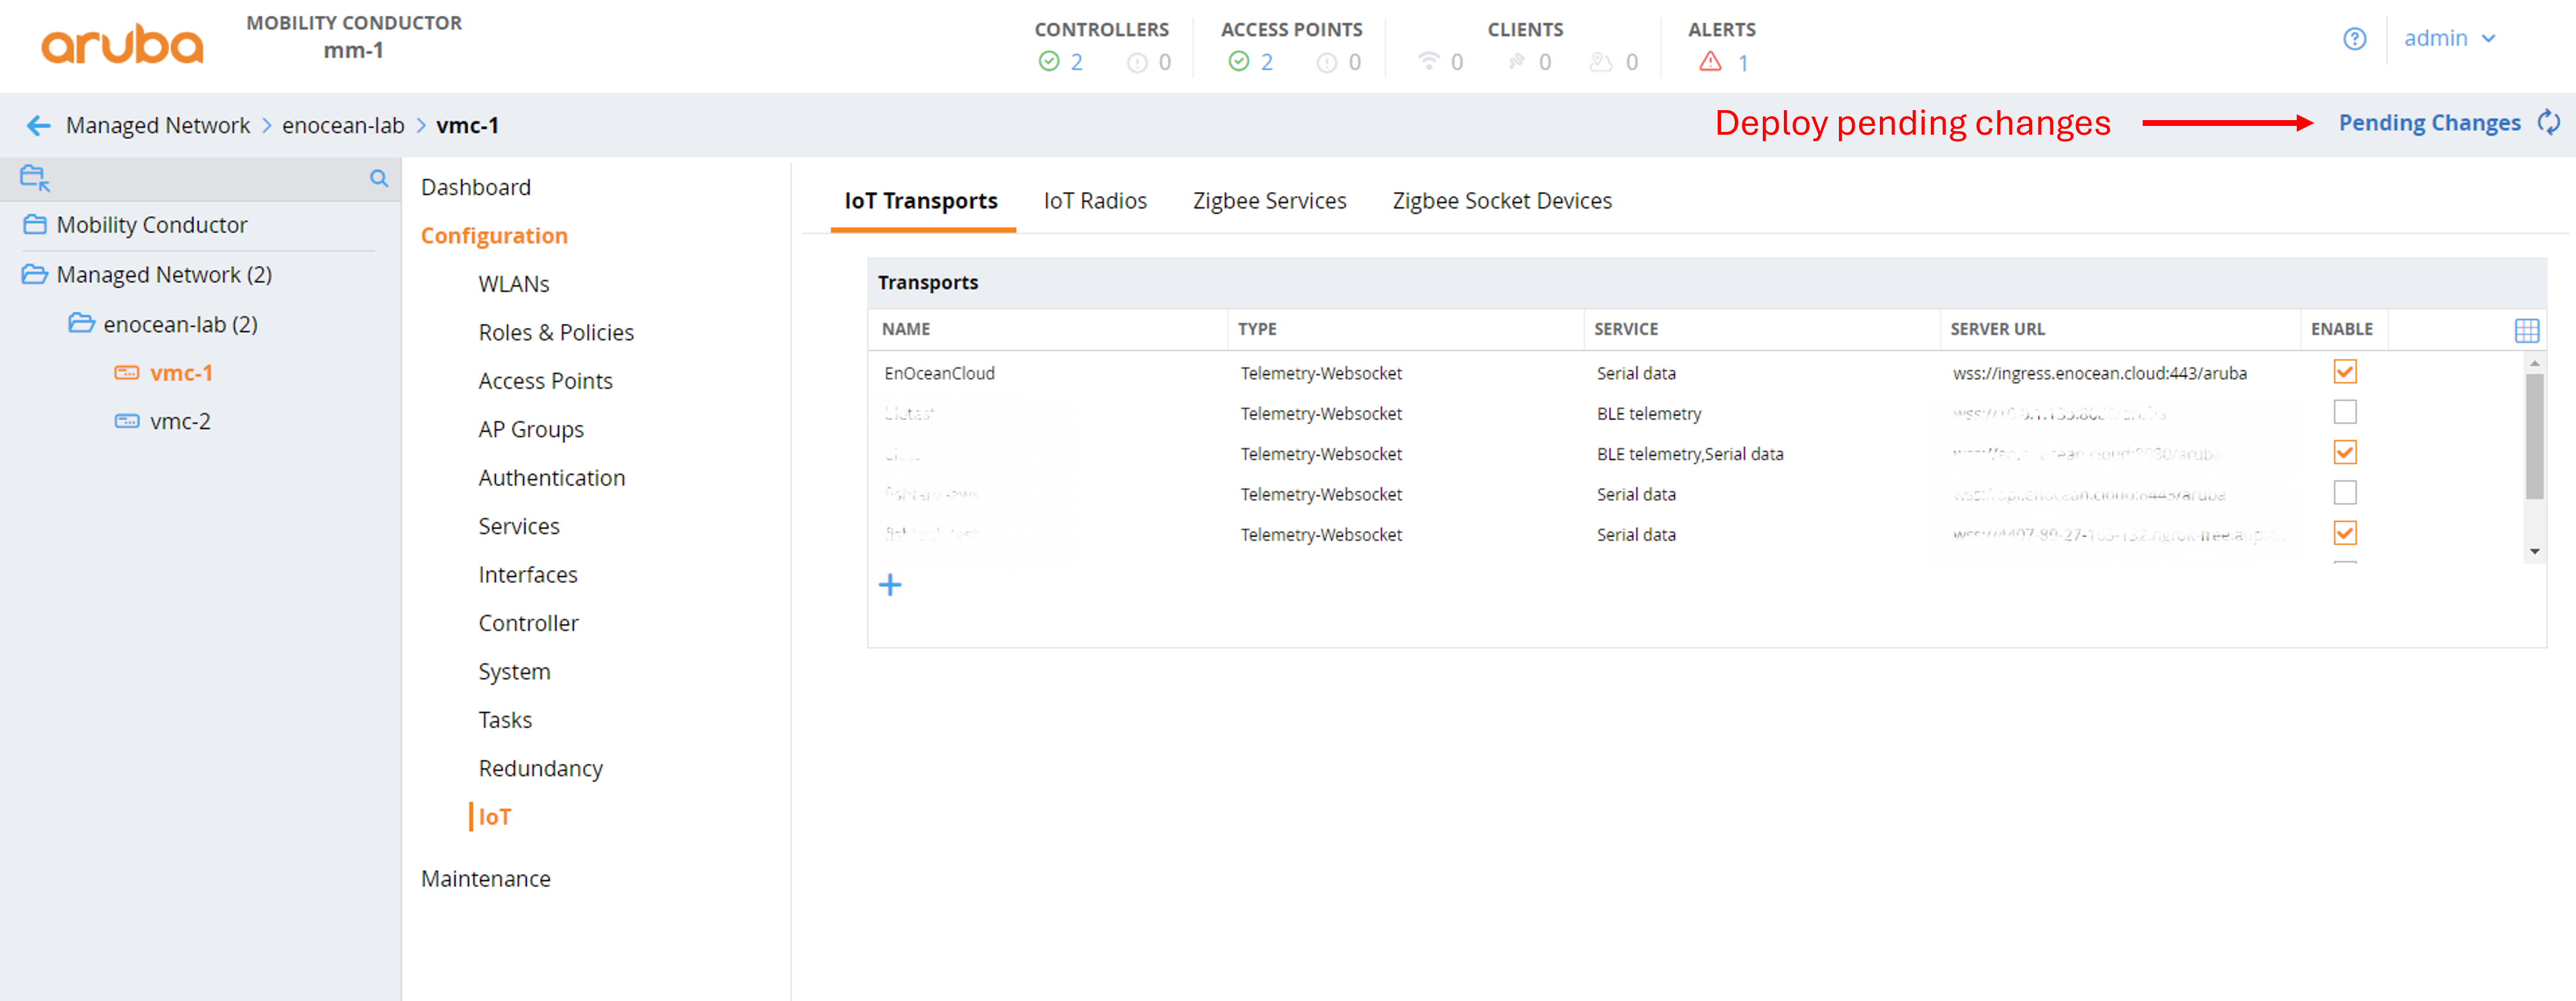
Step 3: IoT transport configuration
-
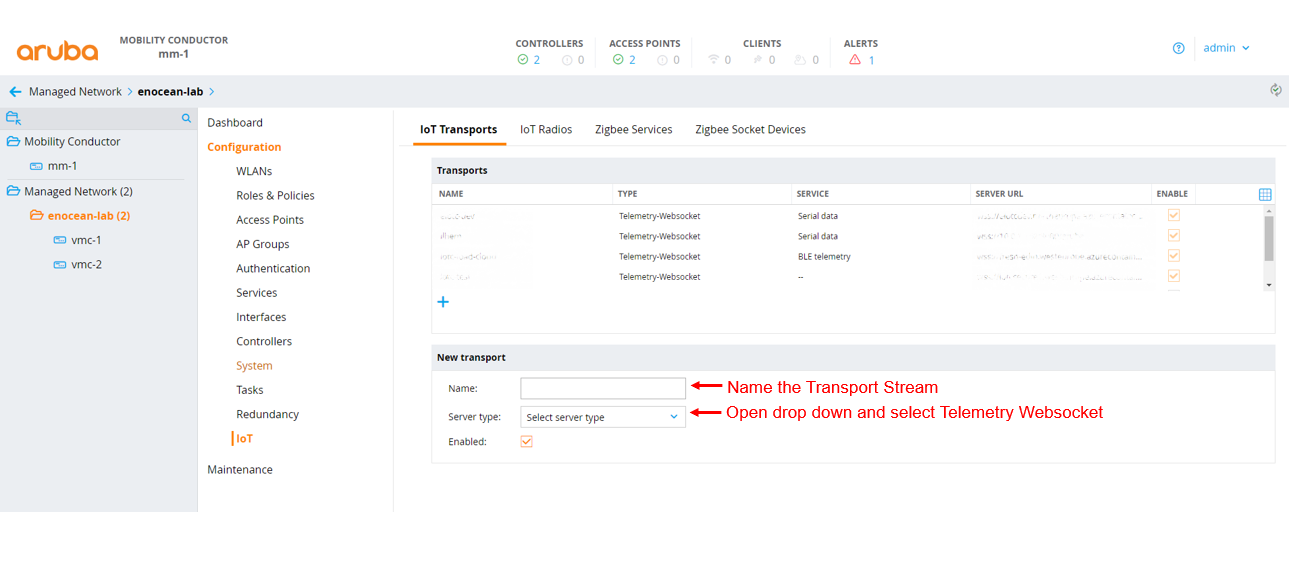
In Aruba managed network select Configuration -> IoT -> Transport streams then add a new transport using the + icon.
Enter the following information in the IoT transport tab:


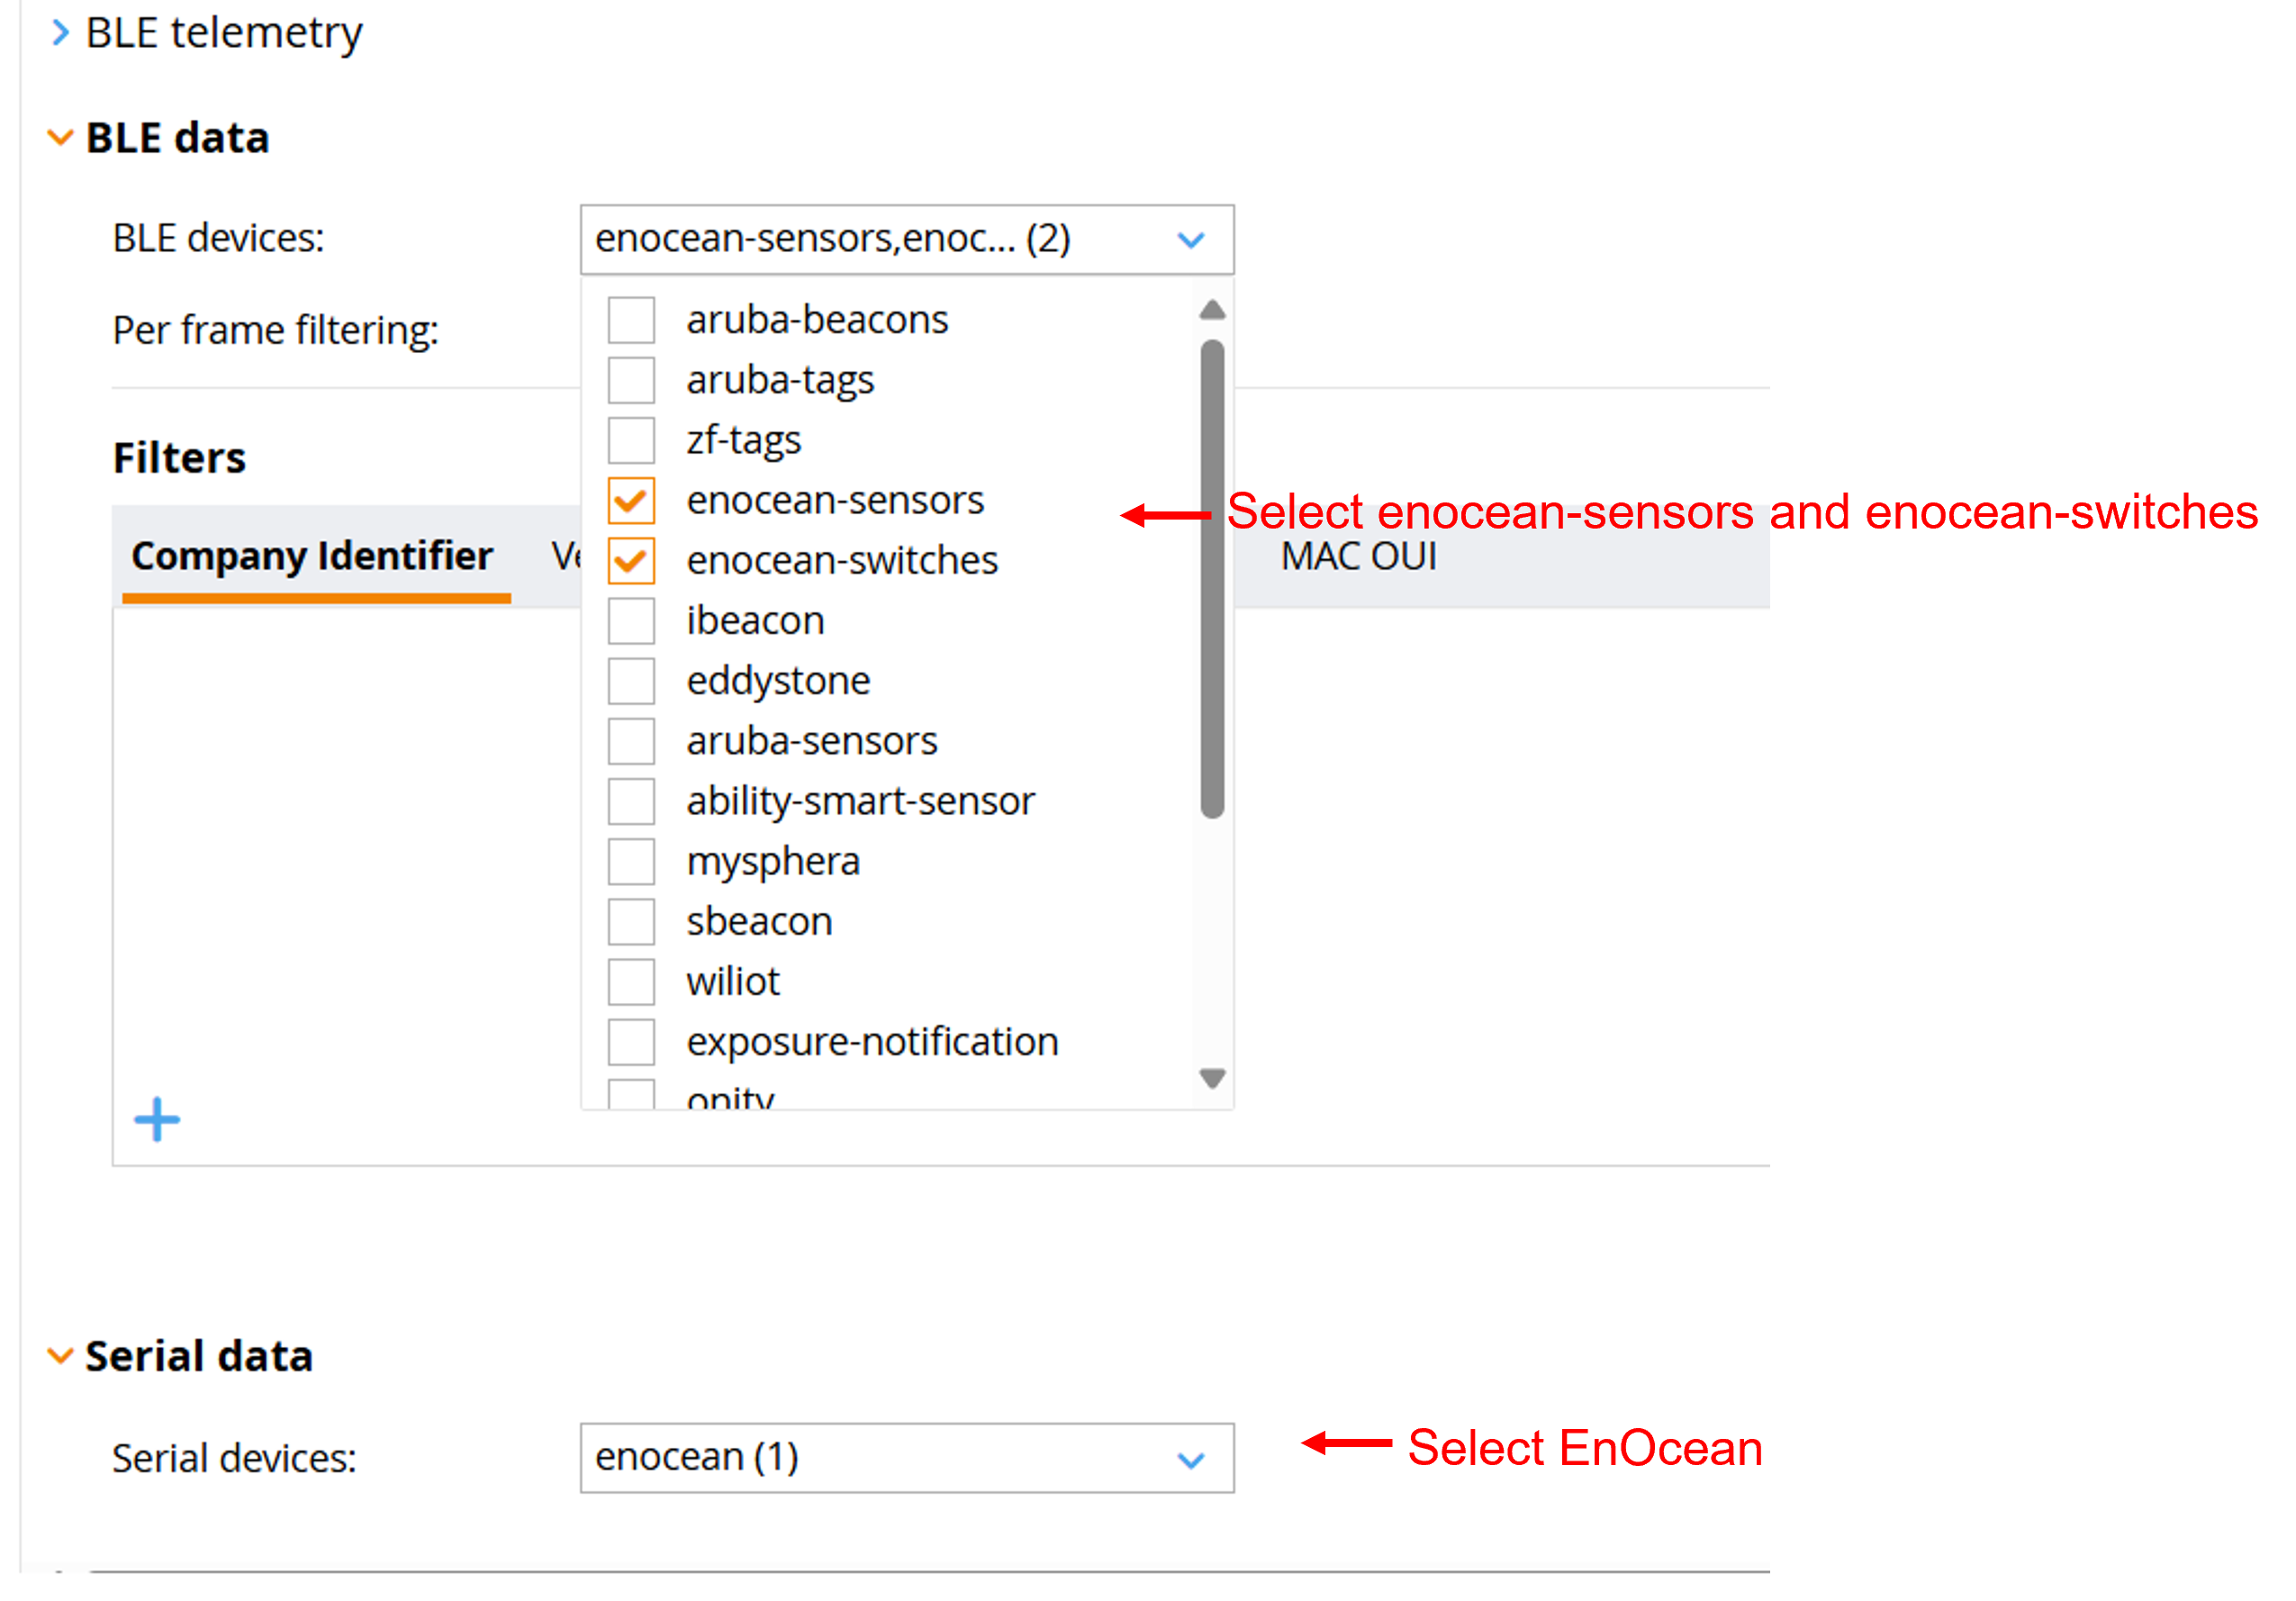
-
Check that you transport stream is enabled:
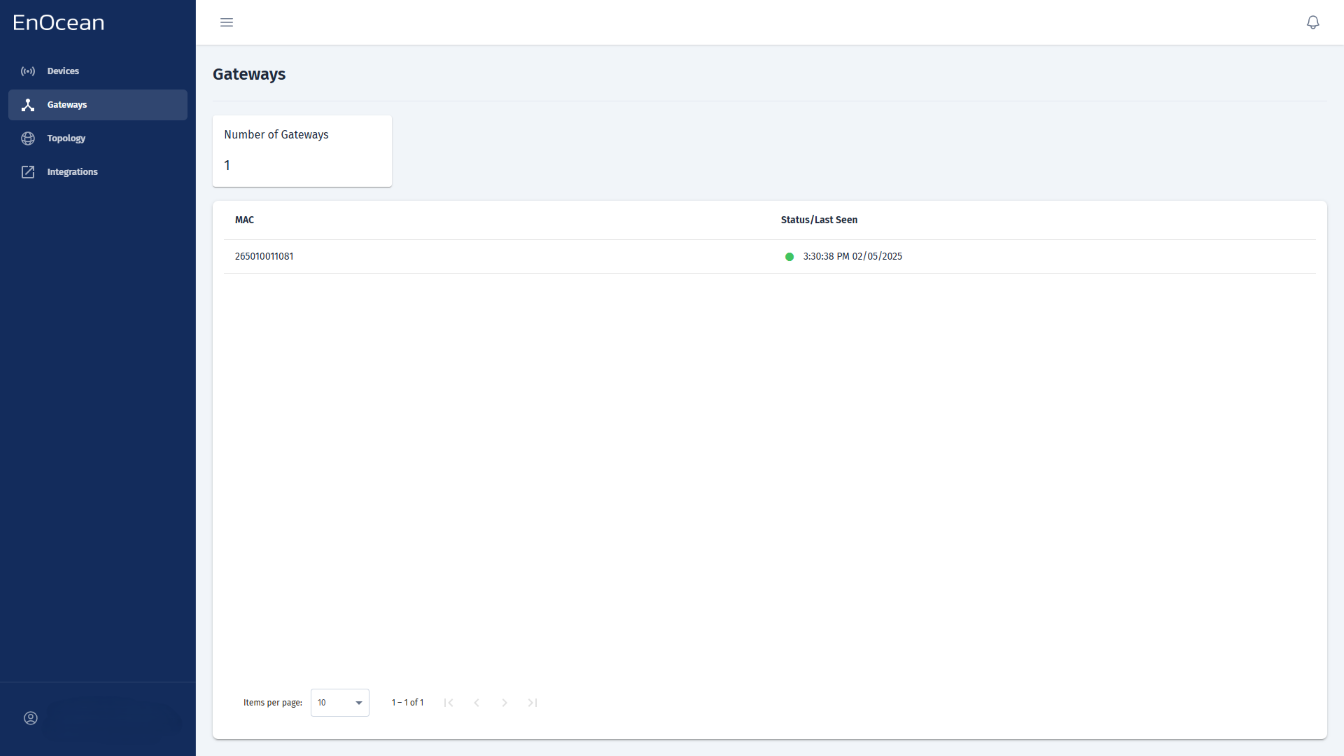
Step 4: Verify that your Gateway is connected
You can check the gateway status directly from the Gateways tab in the EnOcean SmartStudio dashboard:
- Log in to the EnOcean SmartStudio web interface.
- Navigate to the Gateways tab.
-
Locate your gateway in the list and check its connection status.
Alternatively, you can verify the gateway status using the API:
- Login to EnOcean SmartStudio API.
- Use the GET /v0/gateways endpoint to check the connection status.