Configuration using Aruba Central
Aruba Central
Aruba Central is a cloud-based platform that provides unified management and control over a network of Aruba Access Points (APs), ensuring seamless, secure, and scalable connectivity. Designed for scalability and ease of use, Aruba Central allows IT teams to manage multiple locations and thousands of devices from a single interface.
This document describes how to integrate Aruba Central (AOS 10) with EnOcean SmartStudio using one of the following supported deployment options:
- Option A: VM-based Aruba IoT Collector
- Option B: Aruba Access Point acting as Connector (AOS 10.8+, AP 6xx and above)
Note
EnOcean configuration is currently supported only in Aruba Central (Classic). All EnOcean-related configuration must therefore be performed in Classic Central. The New Central interface can still be used for monitoring, including visibility of Access Points that were configured in Classic Central. However, no EnOcean configuration changes can be made in New Central.
Deployment Options Summary
| Option | Description | Requirements |
|---|---|---|
| Option A – VM Collector | Dedicated Collector virtual appliance | Any supported AP, Collector VM |
| Option B – AP as Connector | AP runs the connector directly | AOS ≥ 10.8, AP6xx and above |
Network Requirements
All communication between the Aruba Gateway or the Aruba Connector and EnOcean SmartStudio is strictly outbound over the default HTTPS port (TCP 443).
Ensure your network/firewall allows outbound connections to the following endpoint:
- Hostname: ingress.enocean.cloud
- Port: 443 (HTTPS)
No inbound connections are required.
If your organization uses strict egress filtering, please update your policies to permit outbound HTTPS traffic to the above endpoint.
Step 1: Connect to Aruba Central
Log into the web-based management page for Aruba Central.
Option A: VM-Based Collector
Step A1: Install Collector
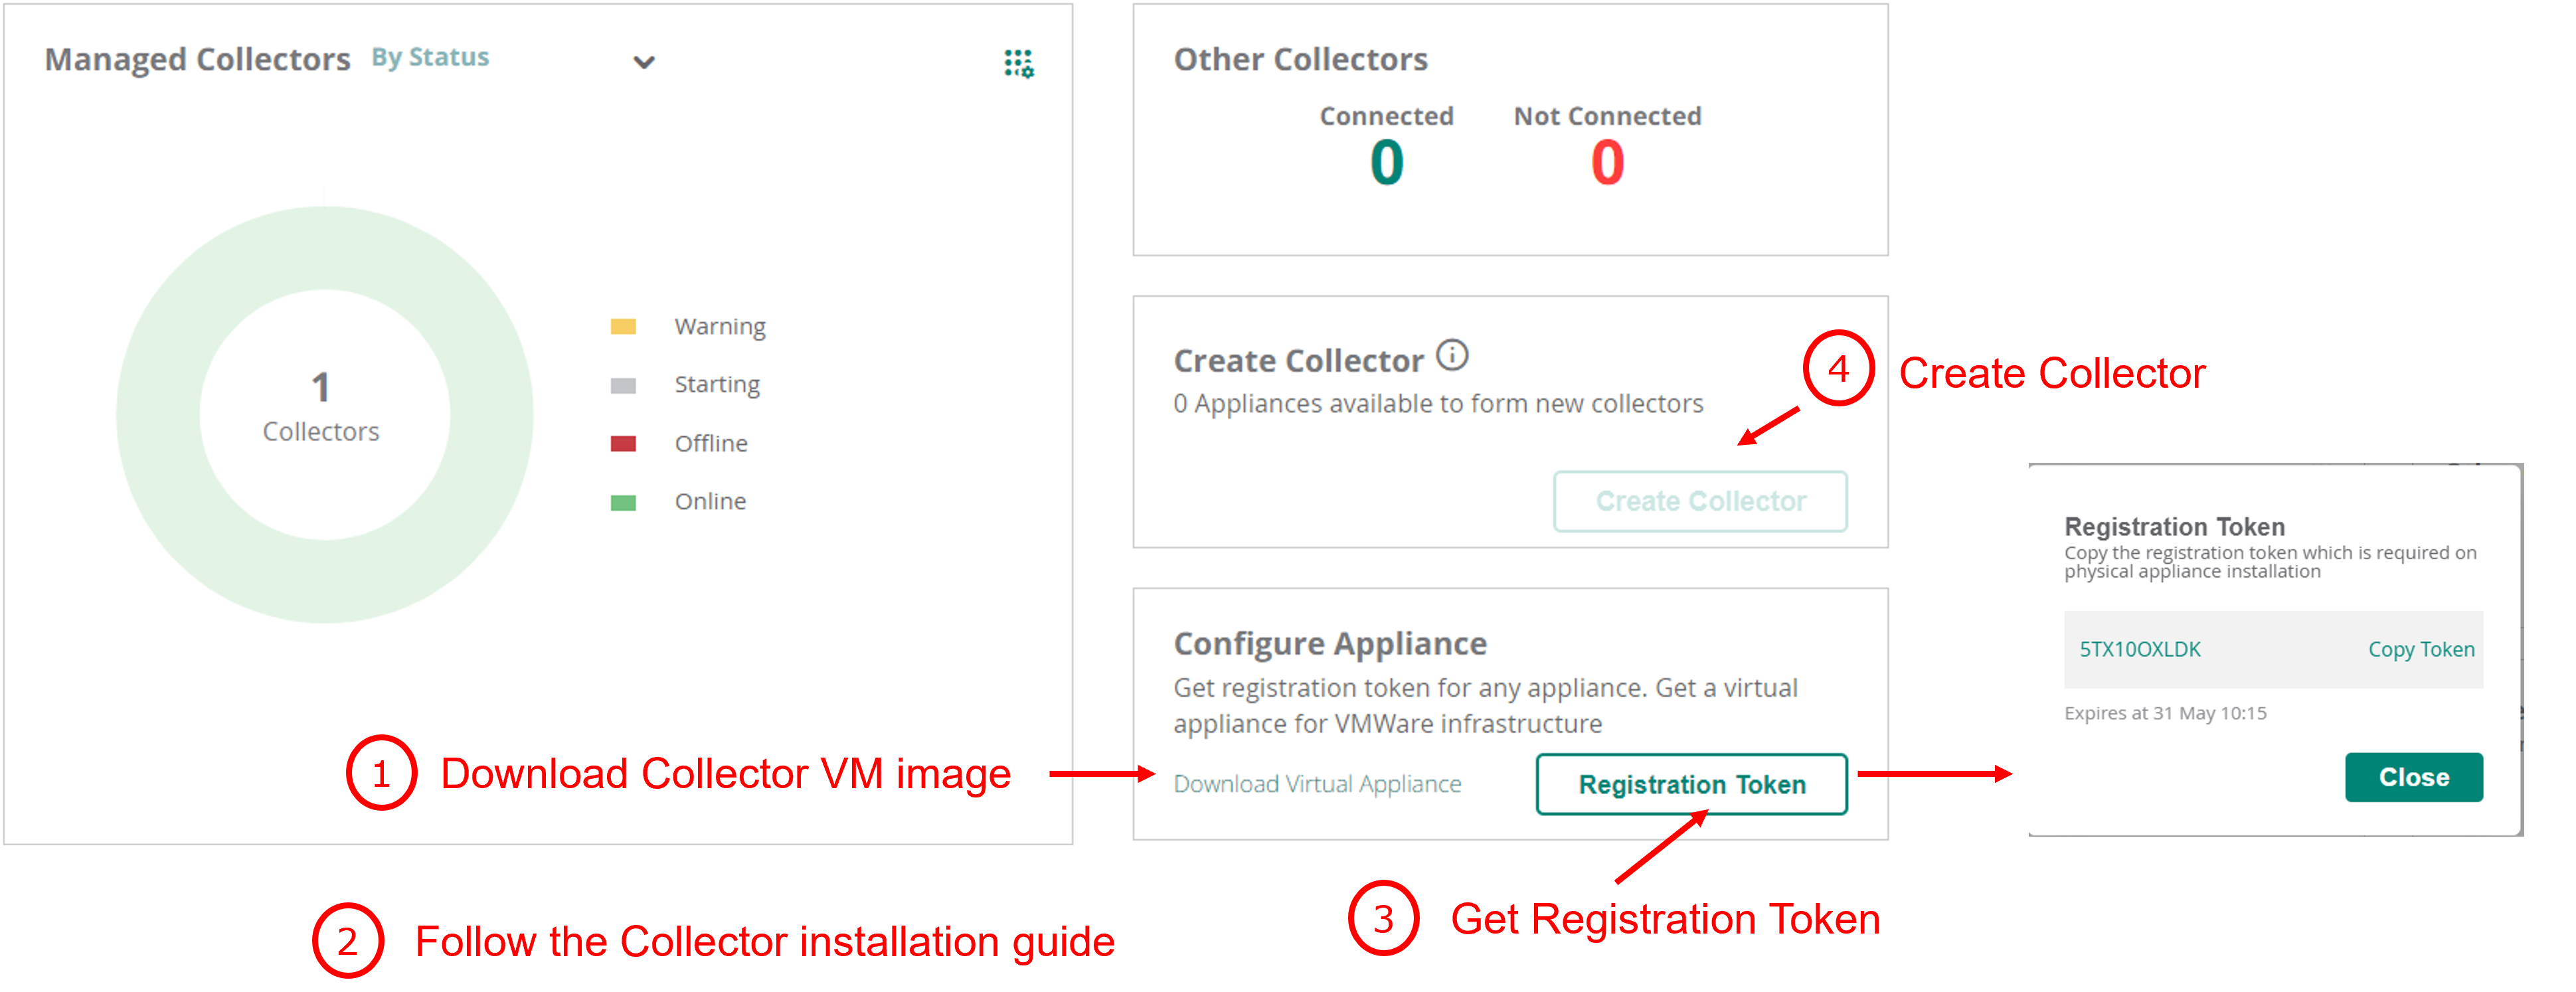
- Under Organization click Platform Integration then Data Collectors.
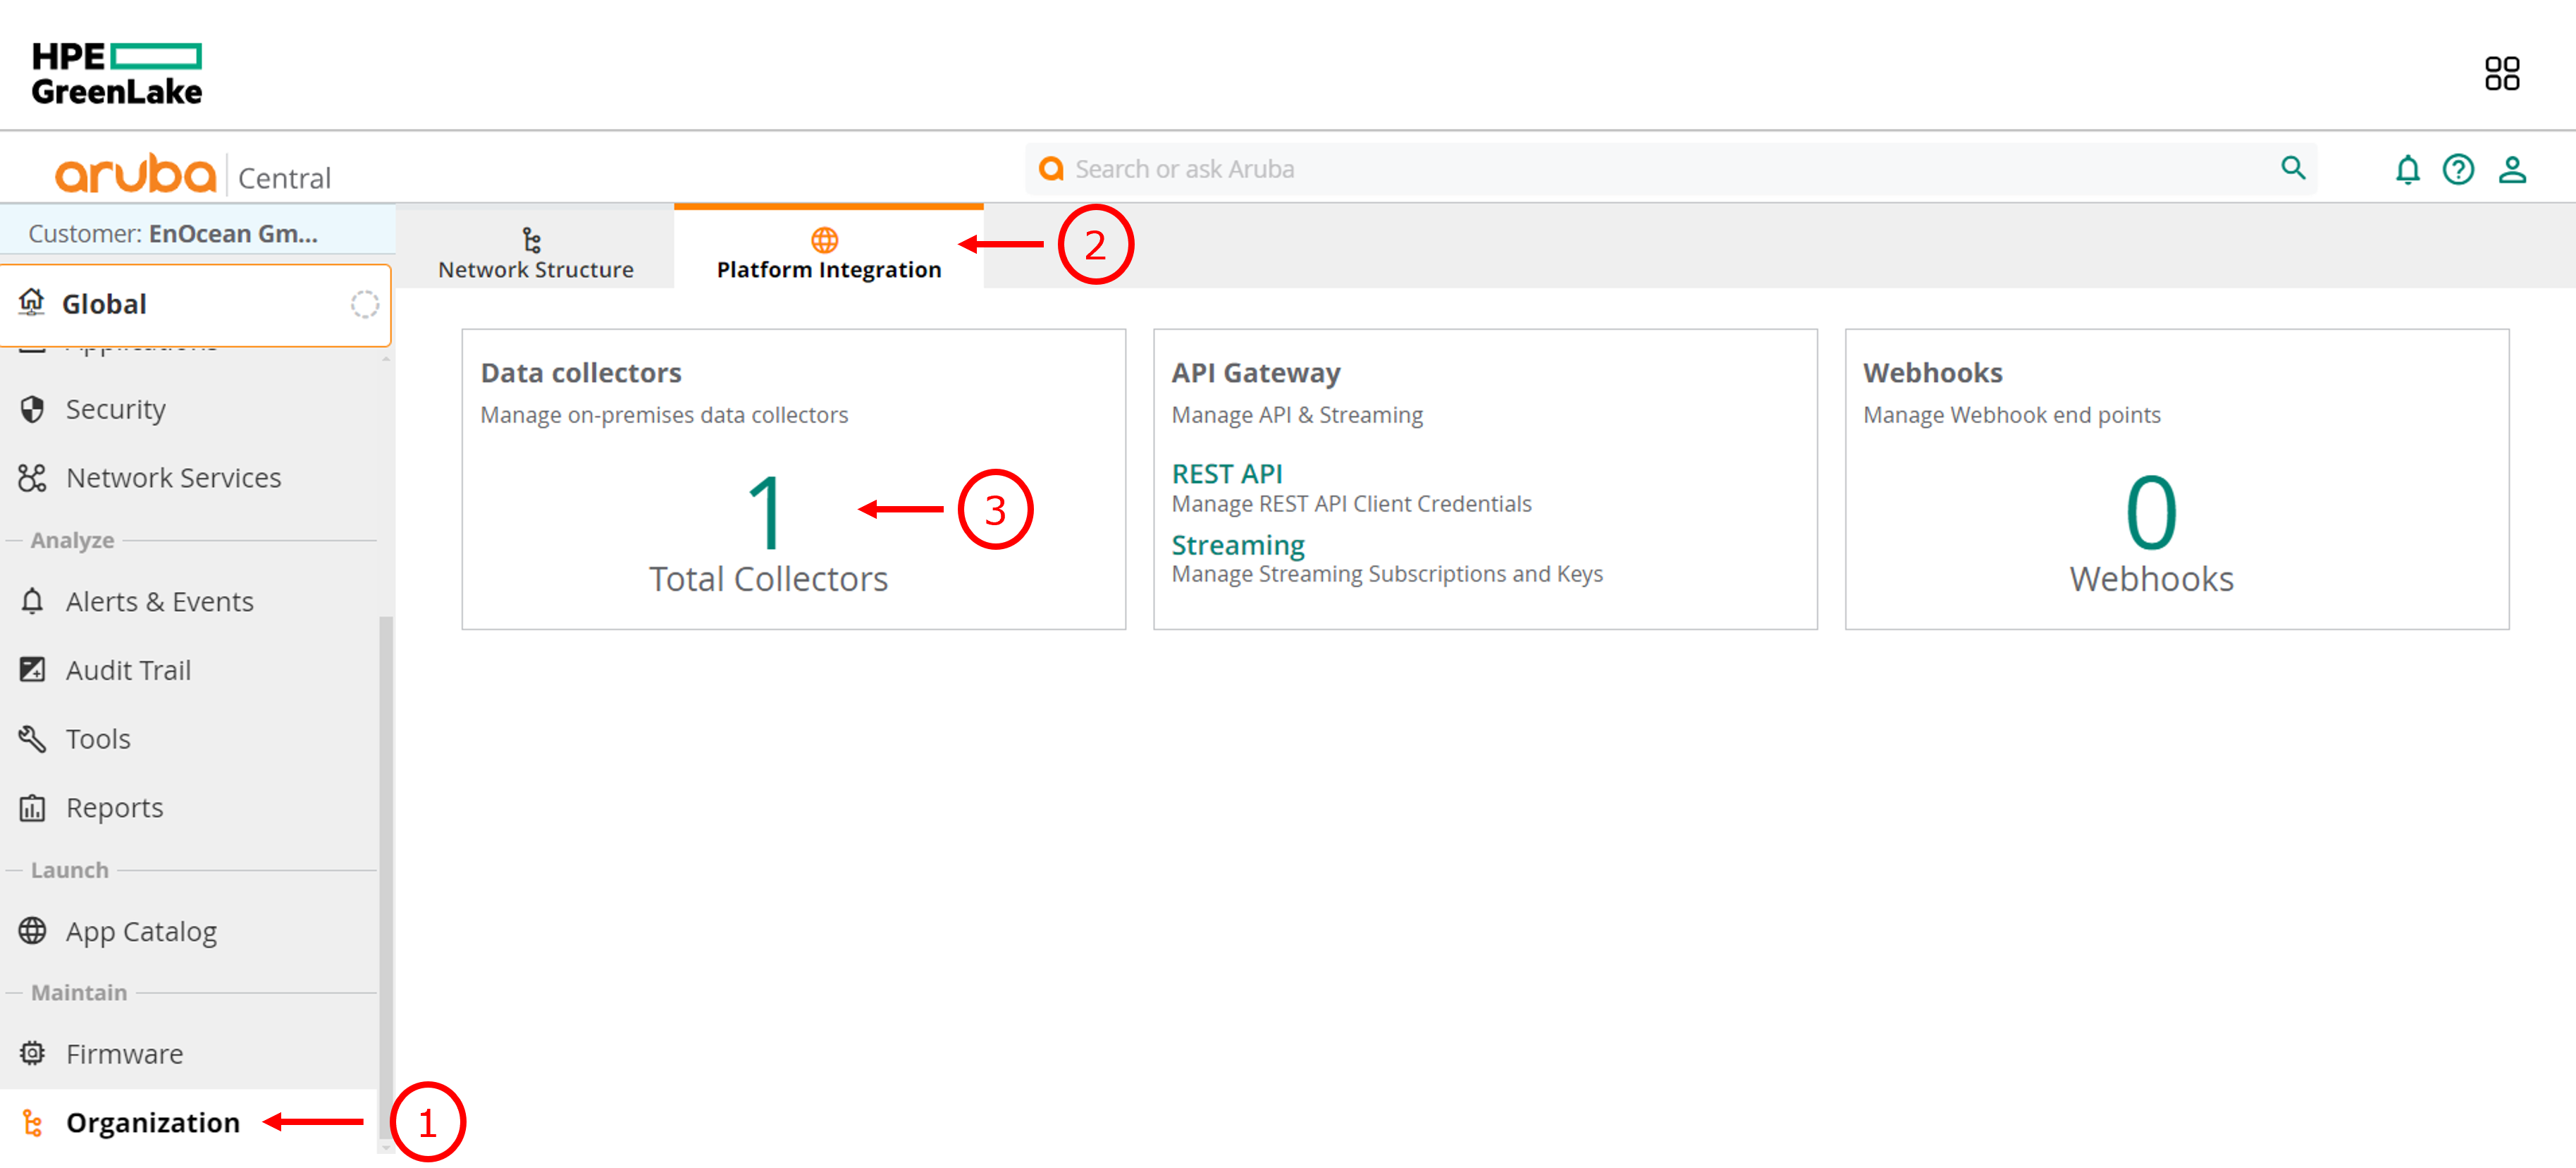
- Under the section Configure Appliance click Download Virtual Appliance (Small or Medium appliance recommended).
- Follow the collector installation guide from Aruba.
- Get registration token under Registration Token.
- Click on Create collector and follow the steps required for the connection.
Step A2: Configure Collector
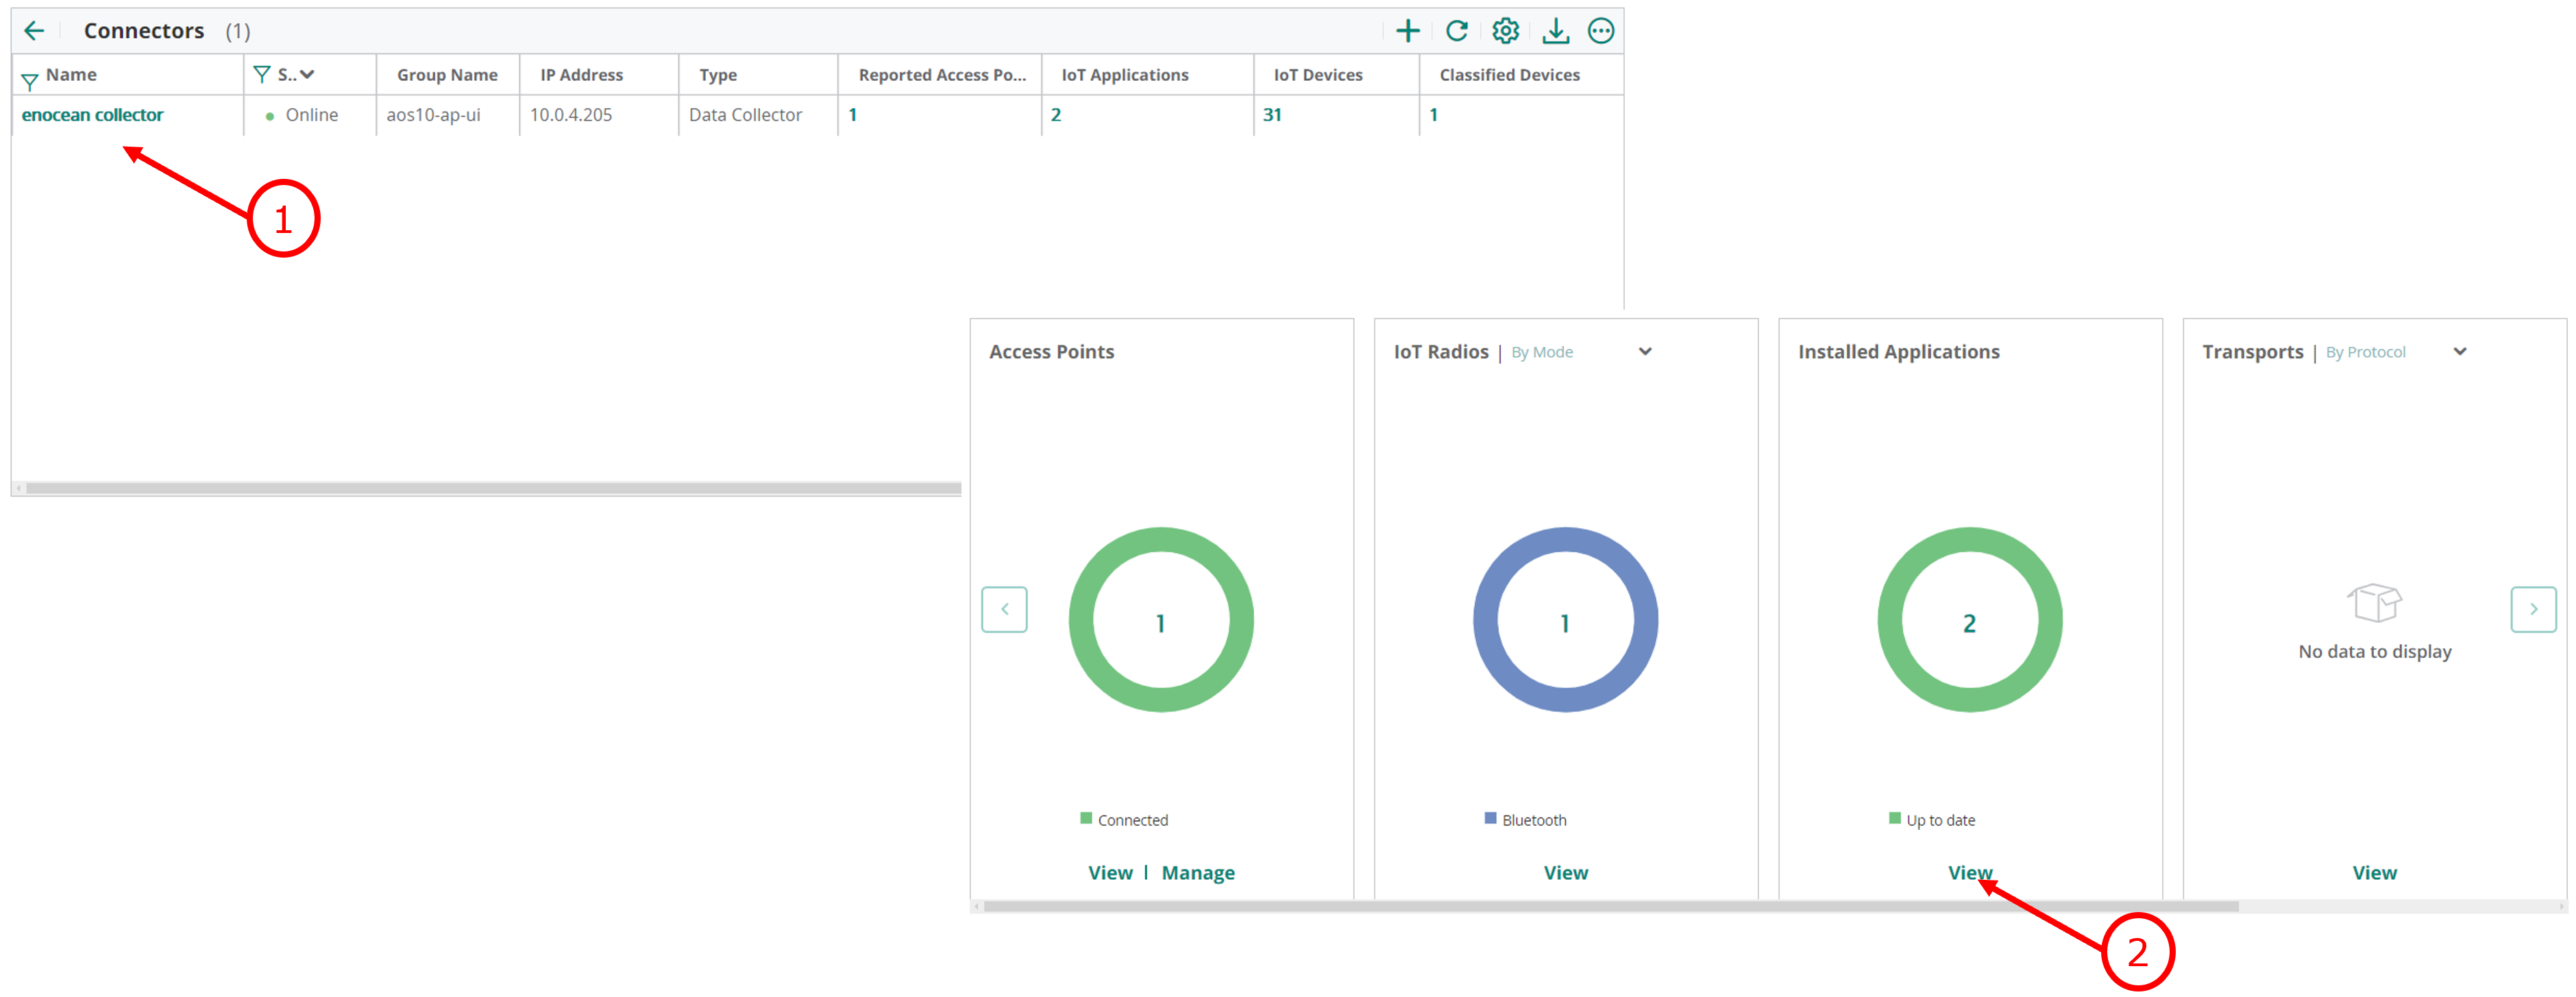
- Under Applications click on IoT Operations then Connectors.
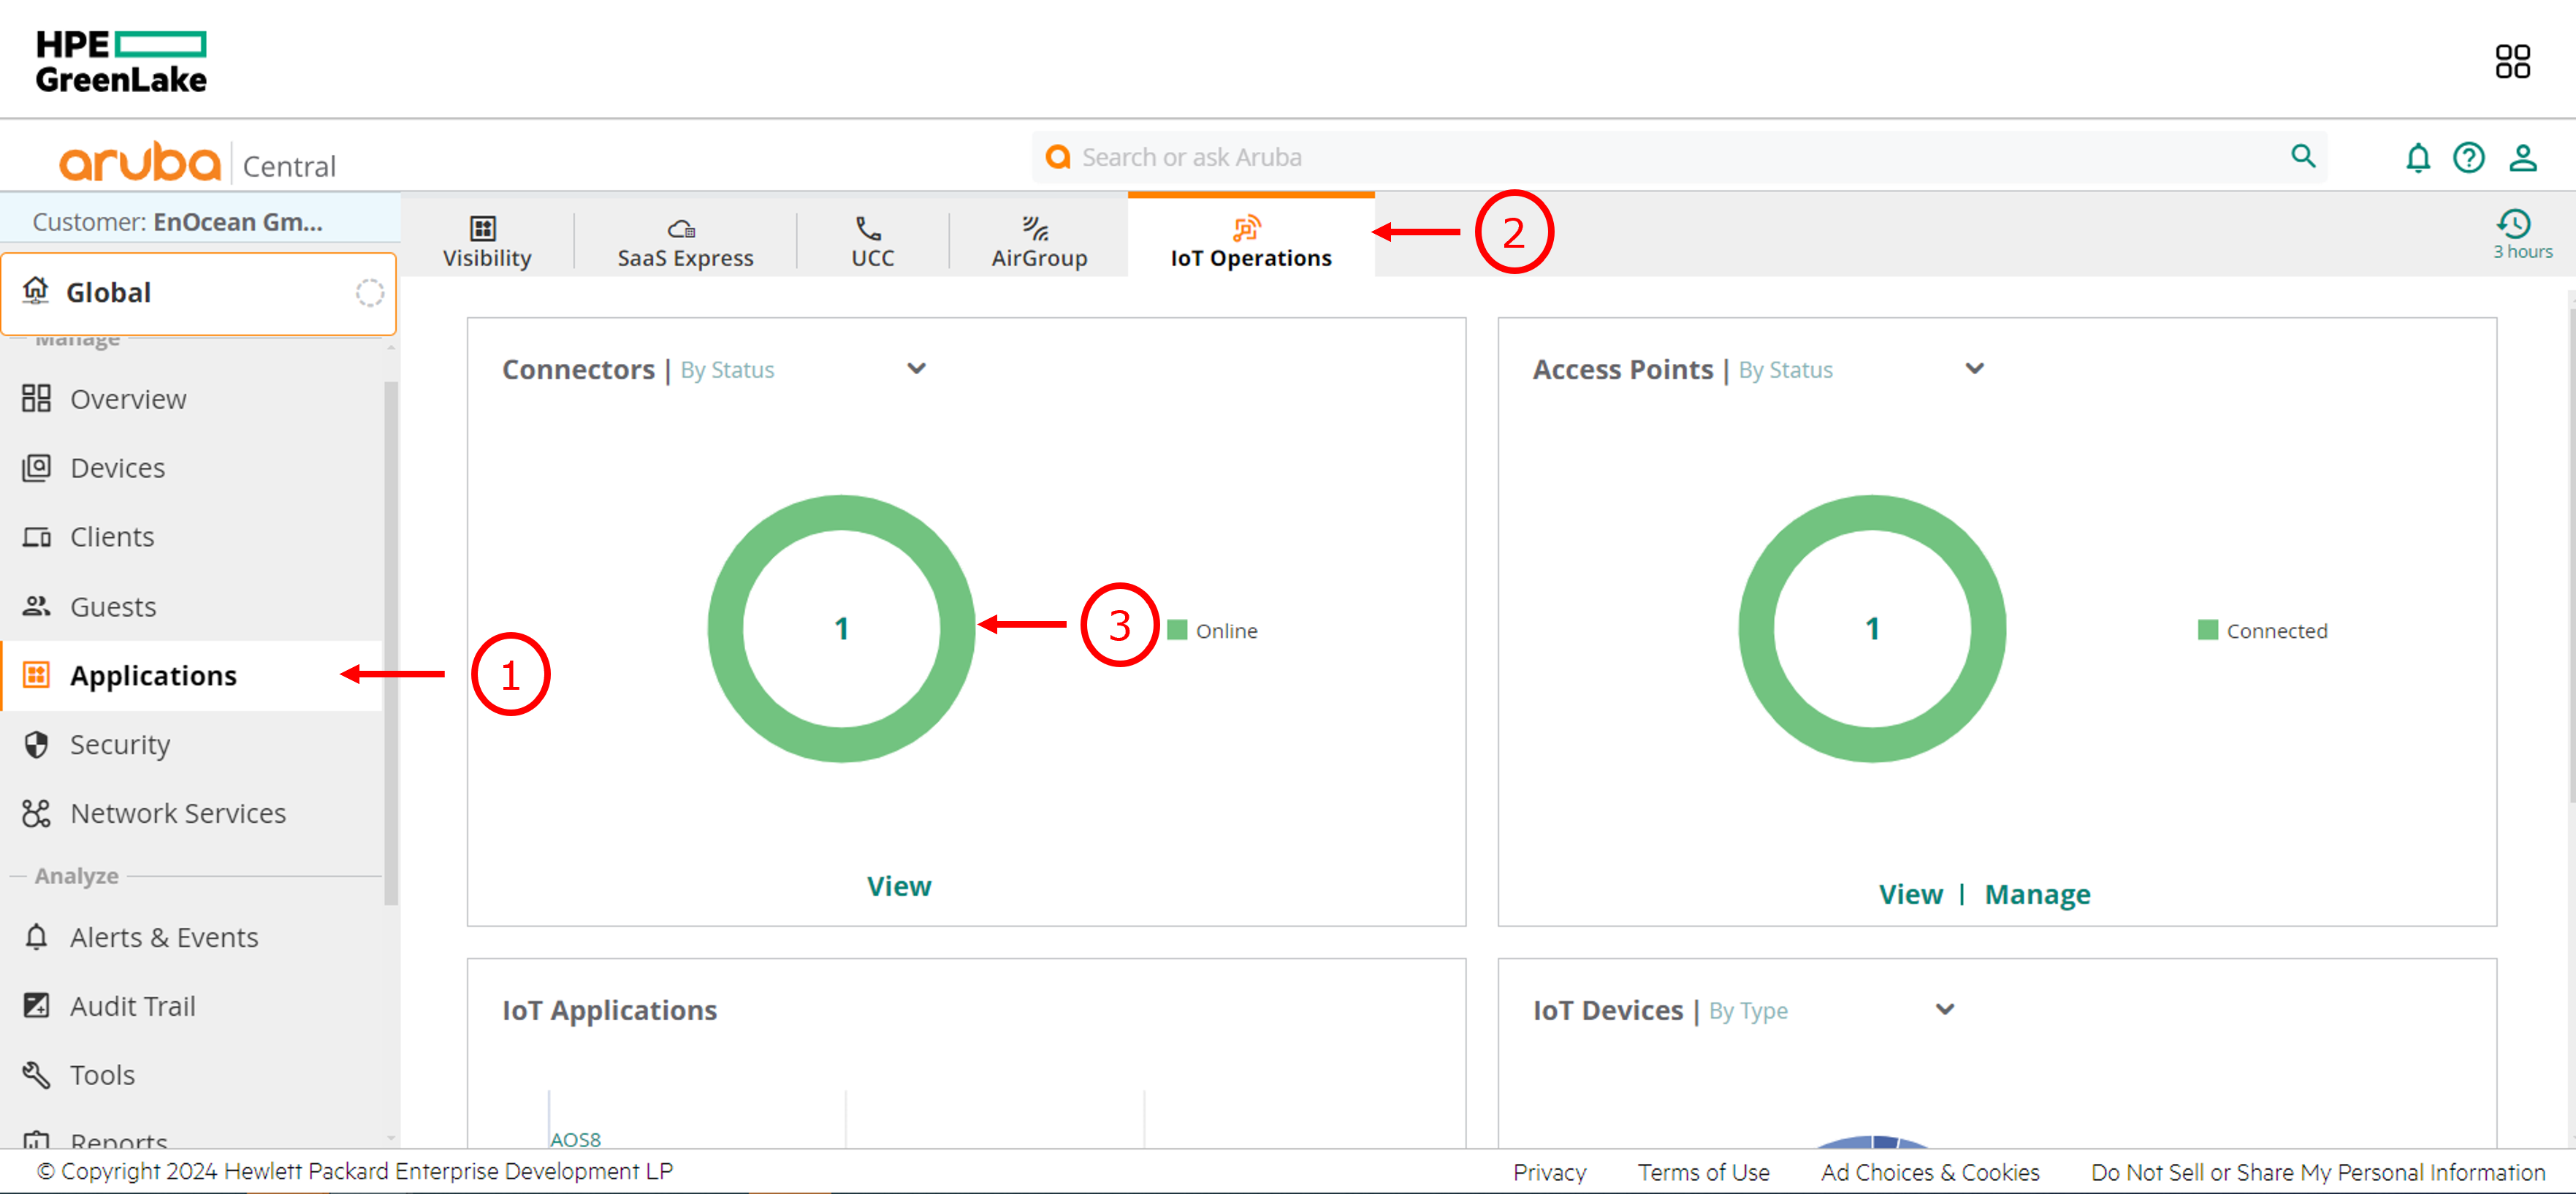
- Select your connector then click on View under Installed Applications
Option B: AP as Connector (AOS 10.8+)
With this option, the Access Point itself acts as the IoT connector. No Collector VM or virtual appliance is required.
Step B1: Verify AP Eligibility
Ensure that:
- The AP is AP6xx or above
- The AP is running AOS 10.8 or later
- IoT Operations is enabled in the AP’s group
Step B2: Enable IoT Operations
- In Aruba Central, navigate to: Applications → IoT Operations
- Confirm the AP is available to run connectors.
Steps A1 and A2 are skipped when using this option.
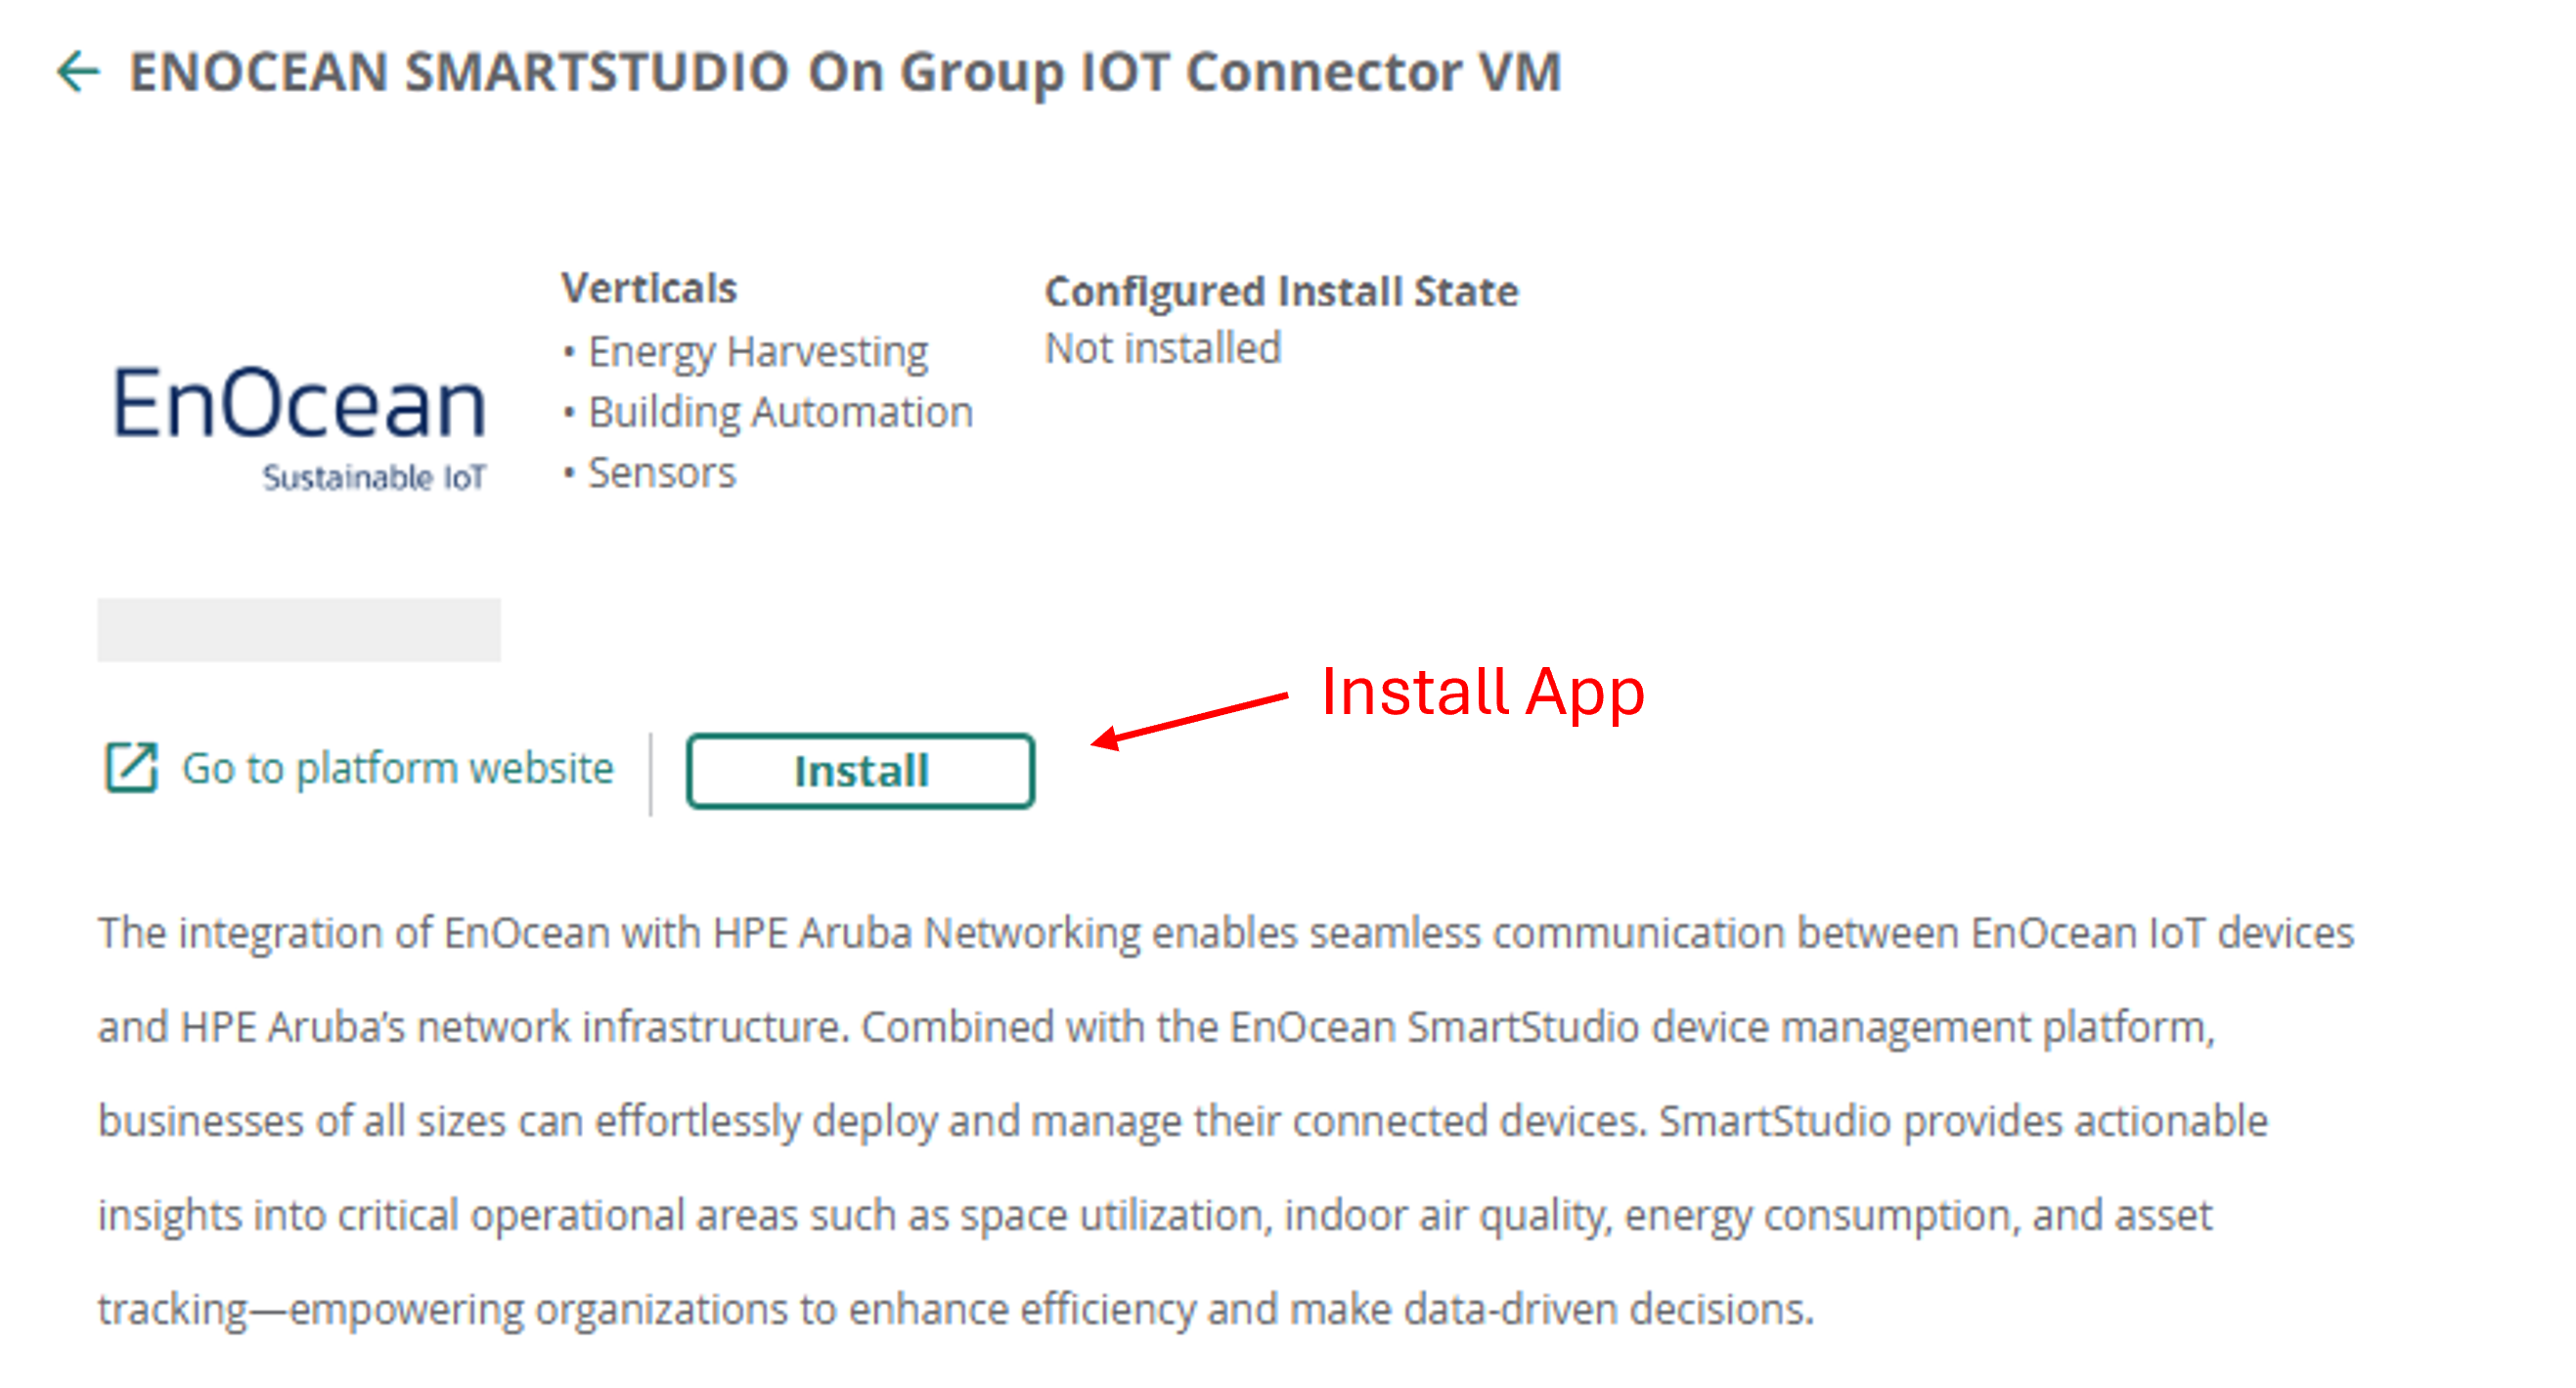
Step 2: Install EnOcean SmartStudio App
- To enable the connection from your APs to your EnOcean SmartStudio account, you will need to install the EnOcean SmartStudio App.
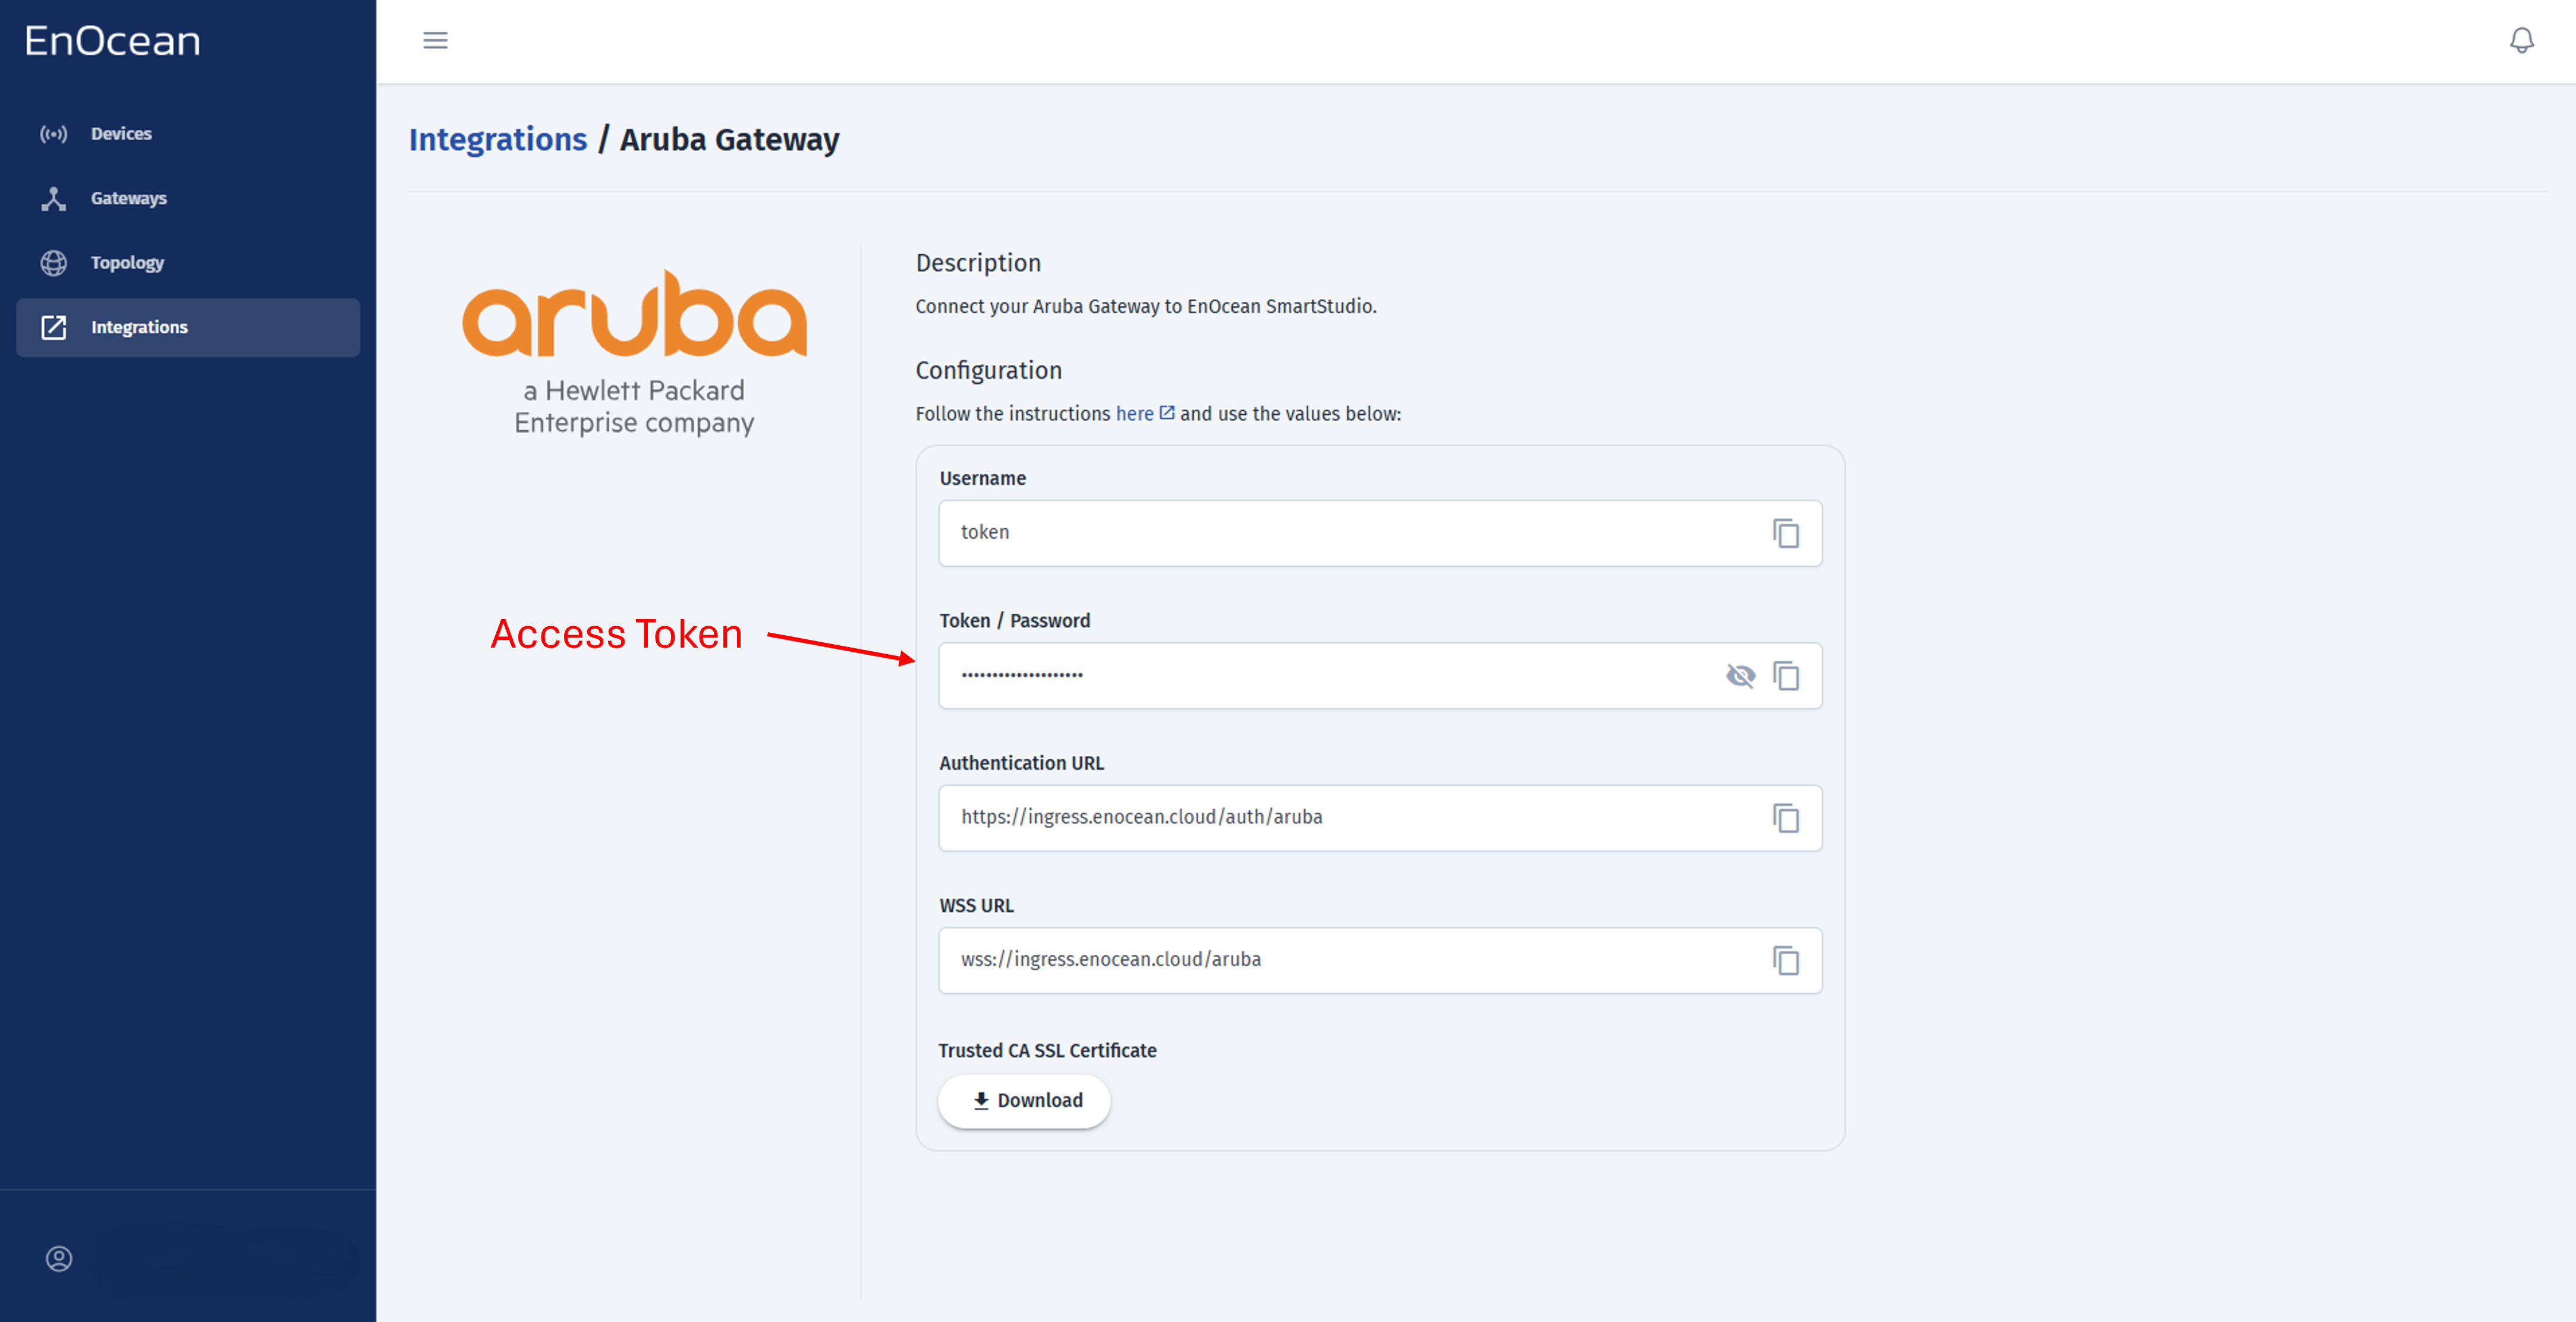
Step 3: Configure EnOcean SmartStudio App
Retrieve the Access Token from SmartStudio -> Integrations -> Aruba Gateway like shown below:
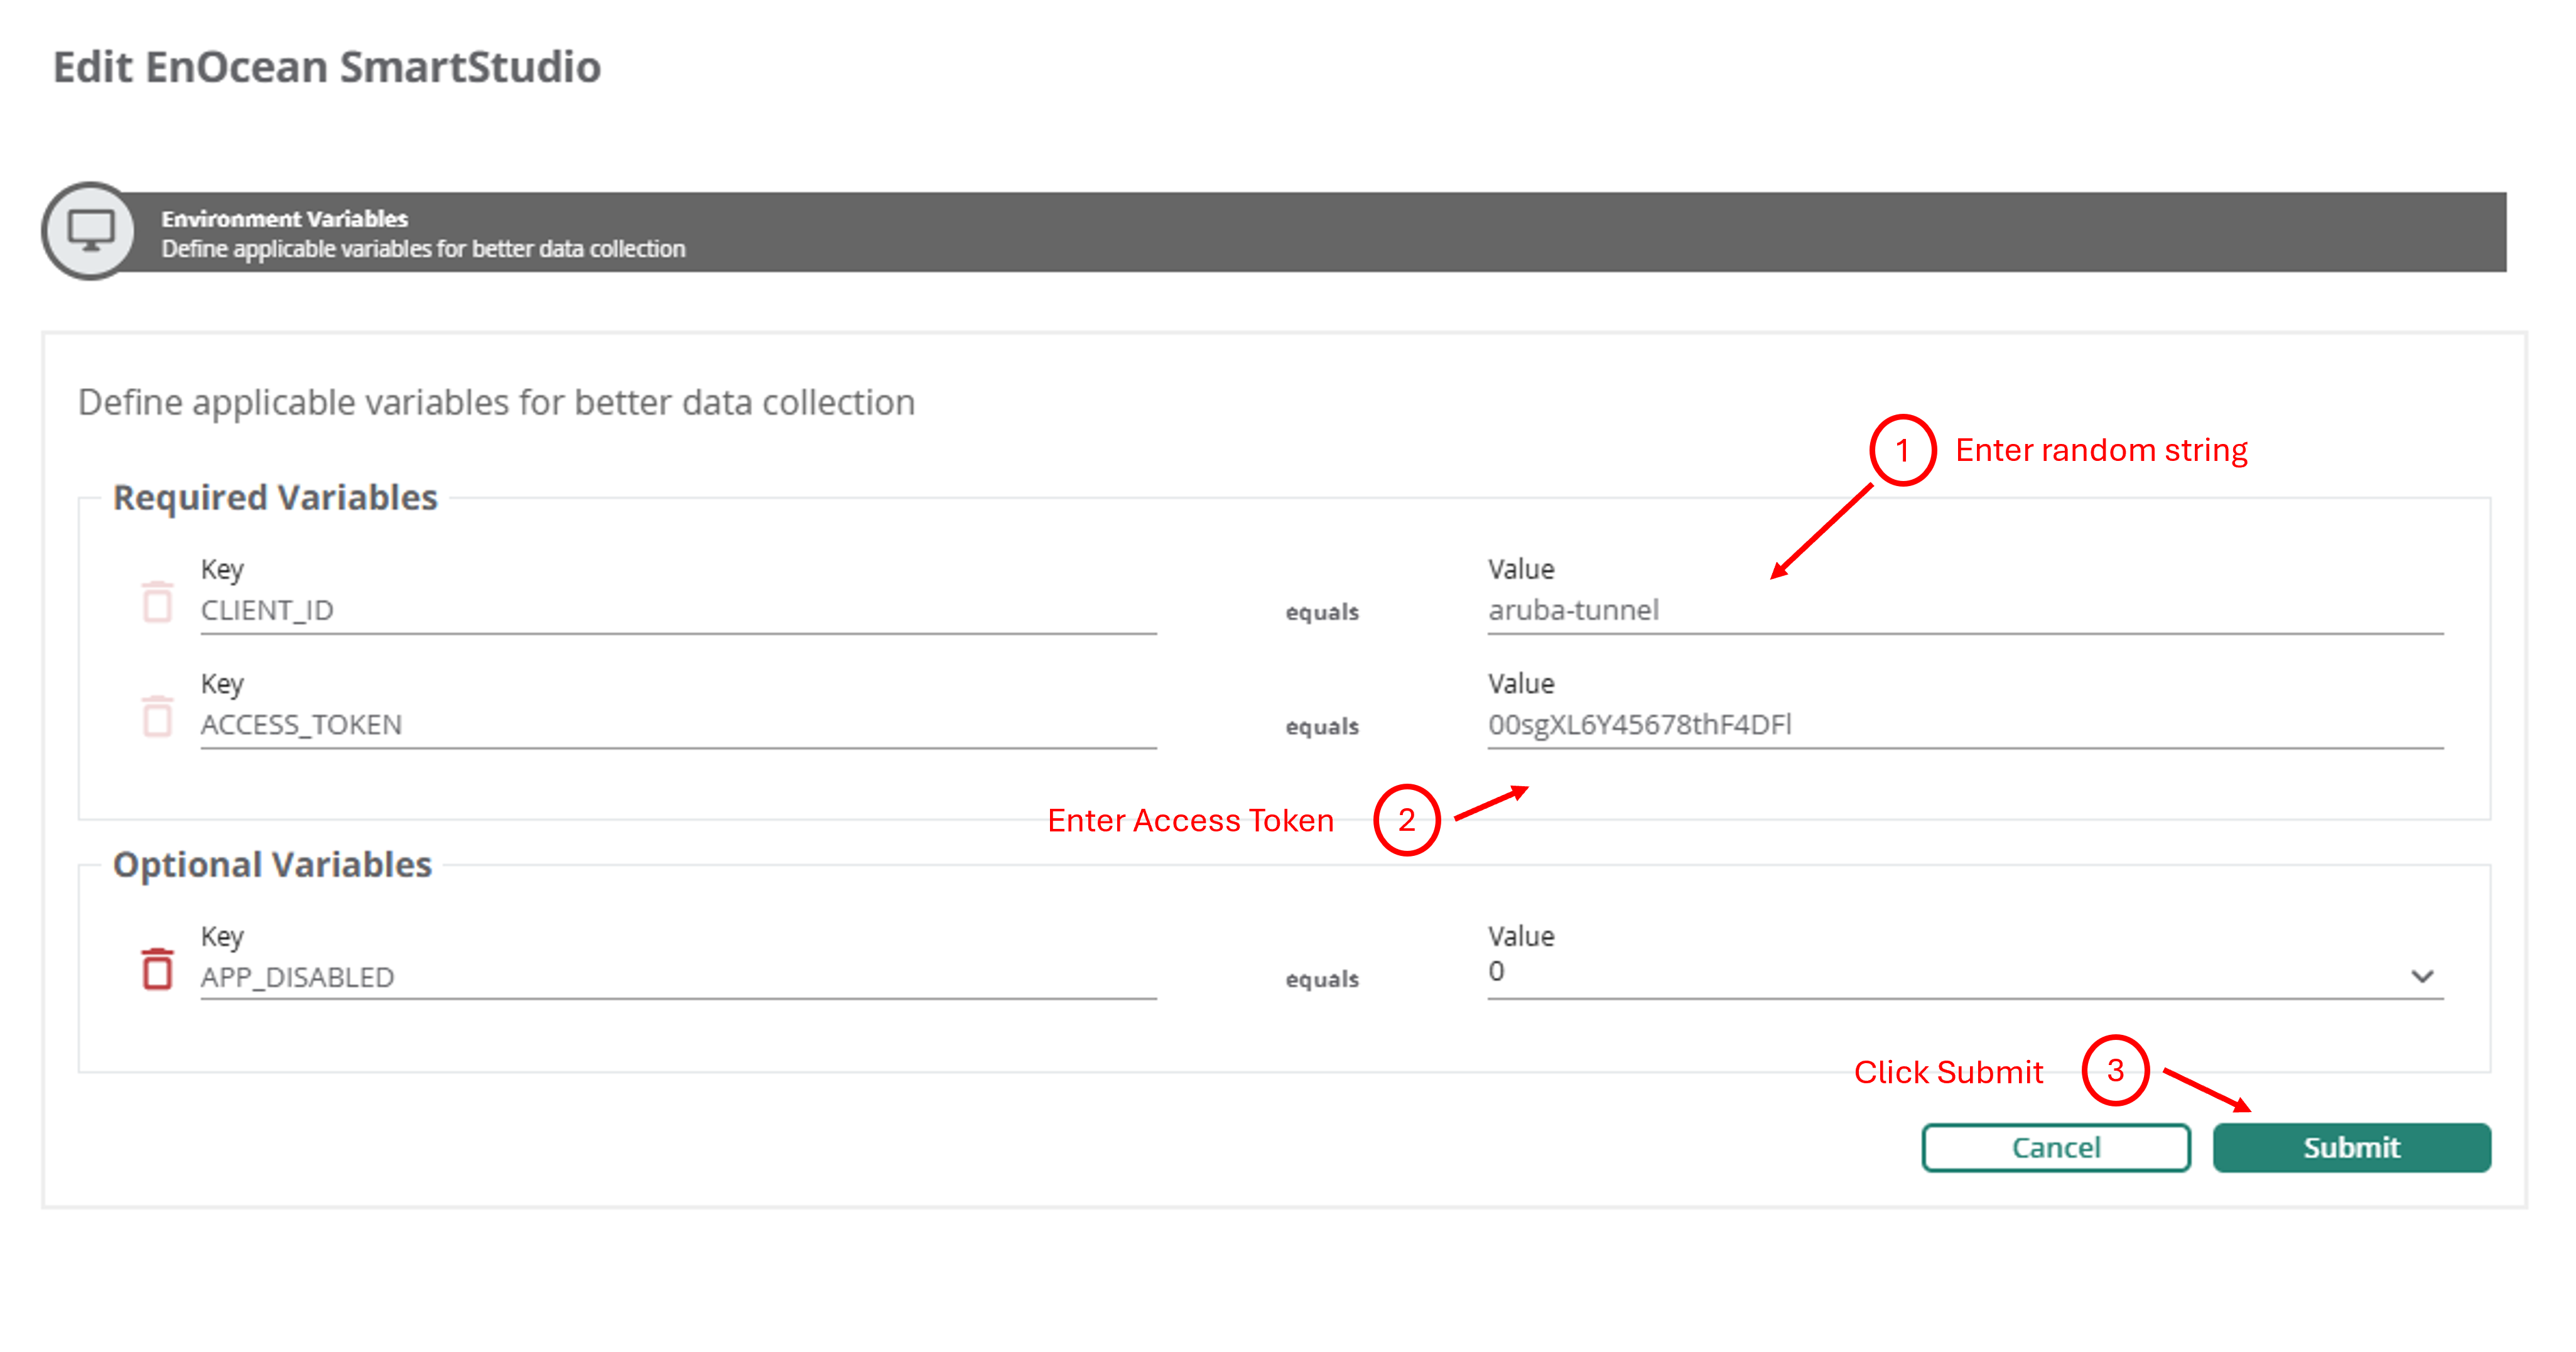
Enter the Access Token in the App configuration page and submit:
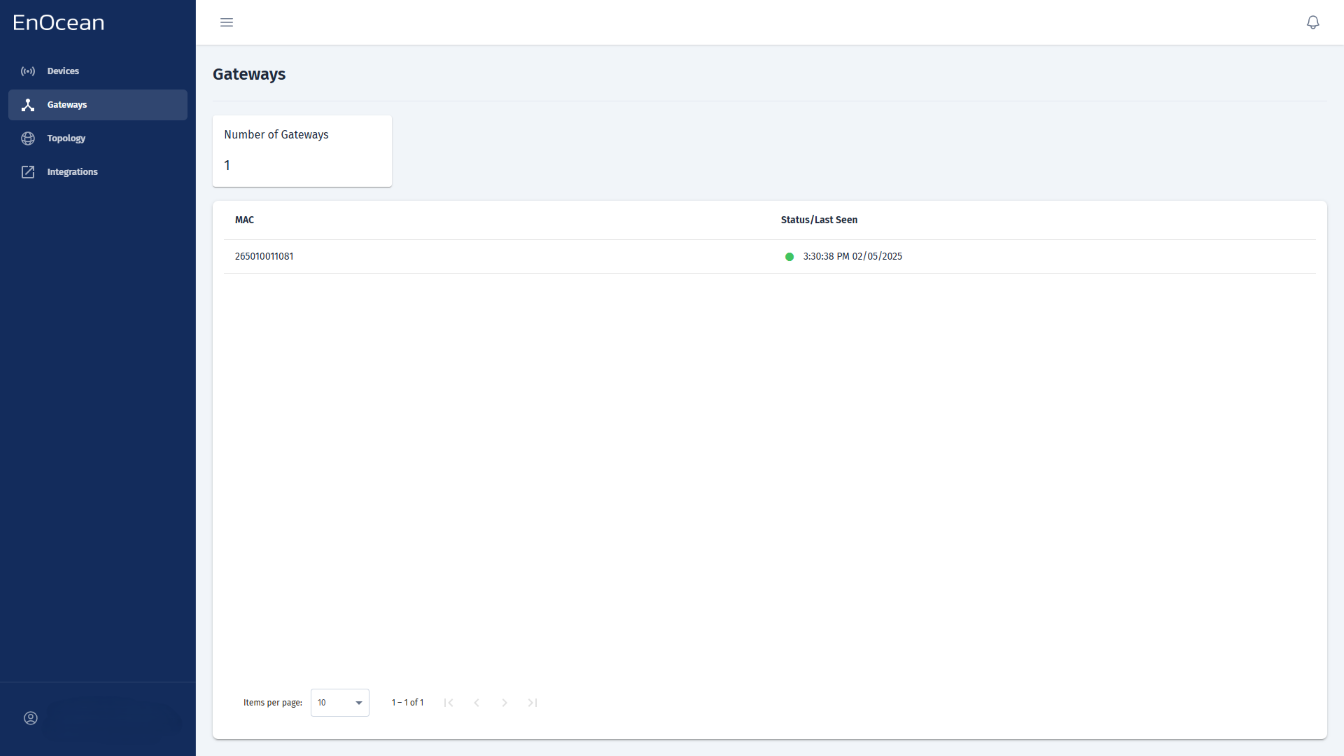
Step 4: Verify that your Gateway is connected
You can check the gateway status directly from the Gateways tab in the EnOcean SmartStudio dashboard:
- Log in to the EnOcean SmartStudio web interface.
- Navigate to the Gateways tab.
-
Locate your gateway in the list and check its connection status.
Alternatively, you can verify the gateway status using the API:
- Login to EnOcean SmartStudio API.
- Use the GET /v0/gateways endpoint to check the connection status.